
Picture this: you just moved into a cozy two‑story house, boxes still unpacked, and the first thing on your mind is making sure everyone inside stays safe. You’ve heard the alarm sounds, but you’re not sure how many carbon monoxide (CO) detectors you actually need to feel comfortable.
That feeling of uncertainty is completely normal. CO is invisible, odorless, and can creep into any home—especially if you have fuel‑burning appliances, a garage attached to the house, or even a fireplace you love to light on chilly evenings. The question, then, is simple: how many detectors do you need to keep that silent threat at bay?
Here’s the straightforward rule we follow at Home Security Ready: place a detector on every level of your home, including the basement and any attached garage, and make sure there’s one outside each sleeping area. For a typical single‑family home, that often means three to four devices. If you have a larger property or a multi‑unit building, you’ll want one per floor and one in each separate sleeping zone.
Let’s break it down with a real‑world example. Jane, a new homeowner in Raleigh, installed two gas furnaces and a wood‑burning stove. She started with a detector in the hallway near the furnace, added another by the master bedroom door, and placed a third in the garage where the car sits. After a few weeks, she felt a noticeable peace of mind because the alarms covered all the high‑risk zones.
Want a step‑by‑step checklist? Here’s what you can do right now:
- Identify every floor and sleeping area in your home.
- Count the number of fuel‑burning appliances (furnace, water heater, stove, fireplace, garage door opener).
- Install a detector on each level, preferably near the ceiling where CO rises.
- Place a detector within 10‑15 feet of every bedroom door.
- Test each unit after installation and set a monthly reminder to check batteries.
We’ve found that many people forget the garage, even though cars can produce dangerous CO levels. If you keep your car in an attached garage, a detector there is a must‑have. And don’t overlook basements—if you have a furnace or water heater down there, a detector will catch any leaks before they rise to the living spaces.
For detailed placement strategies and installation tips, check out our Carbon Monoxide Detector Placement Guide: How to Install for Maximum Safety. It walks you through the exact spots on a floor plan, plus maintenance advice to keep your devices working year‑round.
If you’re a new homeowner or real‑estate buyer, you’ll also want to share this safety checklist with your agent. Many agents partner with resources like A Brady Brokerage to provide safety recommendations to their clients, making the home buying process smoother and more secure.
If you’re asking how many carbon monoxide detectors do i need for a safe home, the answer is easier than you think. We break down the simple rule: place a detector on every floor—including basements and attached garages—and within 10‑15 feet of each bedroom door, which usually means three to four devices for a typical house, giving you peace of mind.
Table of Contents
- Step 1: Identify Every Potential CO Source and Room Layout
- Step 2: Understand National and Local CO Detector Placement Standards
- Step 3: Calculate the Minimum Number of Detectors Required
- Step 4: Choose the Right Type of Detector for Each Location
- Step 5: Compare Detector Features and Prices in a Quick Table
- Step 6: Install, Test, and Maintain Your Detectors Properly
- Conclusion
- FAQ
Step 1: Identify Every Potential CO Source and Room Layout
Okay, picture this: you just unpacked the last box of kitchenware, and the first thing on your mind is, “Do I have enough carbon monoxide detectors?” It’s a normal gut feeling, especially when you’ve got a furnace humming in the basement and a car that likes to stay in the attached garage.
Before we even talk numbers, let’s do a quick “CO‑source sweep.” Grab a notepad, a flashlight, and walk through each level of your home. Wherever you see a fuel‑burning appliance, write it down. That includes the obvious ones—furnace, water heater, gas stove, fireplace—but also the sneaky spots like a garage‑door opener or a portable generator stored in a shed.
Make a simple inventory
Here’s a tiny checklist you can copy‑paste:
- Furnace or boiler
- Water heater
- Gas stove or range
- Fireplace or wood‑burning stove
- Garage‑door opener
- Portable generator
- Any attached garage where you park a car
Every line you tick is a potential CO‑source that deserves its own watchful eye.
Now, look at the layout of each room. CO is heavier than air, but it rises with warm air currents, so detectors belong near the ceiling—ideally 5‑12 feet above the floor. If a room has a high ceiling, aim for the middle of that vertical space.
Map the sleeping zones
Bedrooms are the most vulnerable because you’re likely to be asleep when CO sneaks in. Measure roughly 10‑15 feet from each bedroom door and mark that spot on your floor plan. That’s the sweet spot for a detector that’ll give you enough warning before the gas gets you.
Don’t forget about the hallway outside the bedroom. A detector there can catch leaks before they drift into the sleeping area. It’s a tiny extra step that makes a big difference.
What about basements? If your furnace or water heater lives down there, install a detector on the ceiling of the mechanical room and another near the stairs that lead up to the living space. That way, you catch any leak at its source and also protect the floors above.
And the garage—most people skip it, but a running car can pump out deadly CO fast. Even if the garage is separate, a detector on the wall nearest the door (but not directly above the car’s exhaust) is a good safety net.
Got the list? Great. Let’s visualize it. Grab a piece of graph paper or open a free floor‑plan app, and plot each detector location based on the rules we just covered. When you step back and see the dots, you’ll instantly know whether you’ve covered every risk zone.
Here’s a short video that walks through a typical home layout and shows exactly where to place each detector. It’s a quick visual refresher that complements the checklist above.
Take a moment after the video to compare the illustrated spots with your own floor plan. If something feels off, adjust—maybe a bedroom door is farther from the hallway than you thought, or a new appliance was added since you last checked.
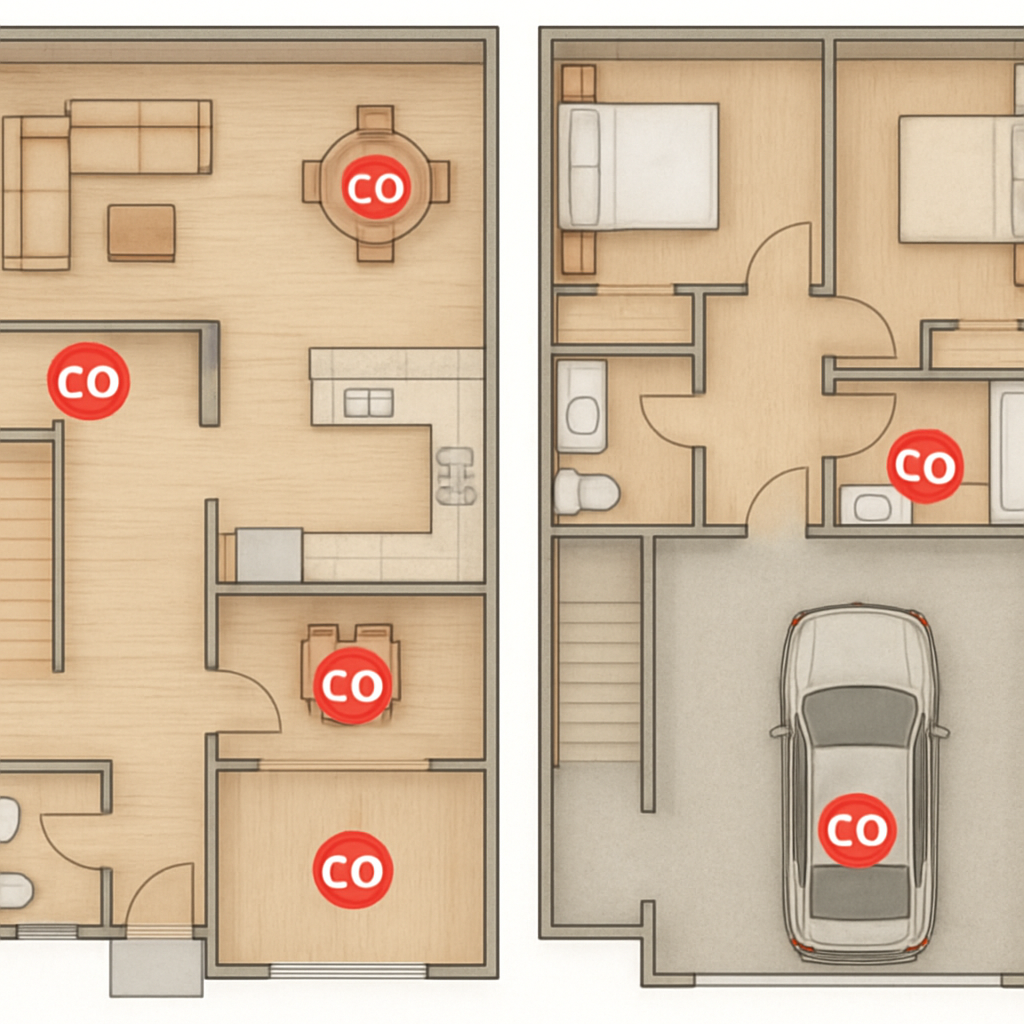
Once you’ve pinned every potential source and plotted the ideal detector spots, you’re ready for the next step: actually installing the devices and testing them. It sounds like a lot, but breaking it down into this simple inventory and layout map turns a daunting task into a handful of quick actions.
Remember, the goal isn’t just to meet a code—it’s to give you peace of mind every night you close your eyes. By identifying every CO source and mapping your rooms first, you set yourself up for a safe, worry‑free home.
Step 2: Understand National and Local CO Detector Placement Standards
Alright, you’ve mapped out your appliances and sleeping zones. The next puzzle piece is making sure each detector lives where the law—and common sense—expect it to.
At the federal level, the National Fire Protection Association (NFPA) and the International Residential Code both say: every level of a home needs a carbon monoxide alarm, and you need one within about 10‑15 feet of any bedroom door. Those rules keep the alarm close enough to wake you up before CO can build to dangerous levels while you’re asleep.
What the code actually looks like
Most states copy those model codes, but they add their own twists. For example, many jurisdictions require detectors to be hard‑wired with a battery backup, while others allow fully battery‑powered units as long as they’re UL‑listed. Some places even mandate that detectors be interconnected, so if one goes off, they all sound.
That’s where Kidde’s CO detector placement guidelines come in handy. Their summary breaks down the typical state‑by‑state requirements, from the “must be hard‑wired” rule in California to the “any UL‑listed unit is fine” approach you’ll see in many Midwestern states.
Local nuances you can’t ignore
Even if your state follows the model code, counties and cities often have their own amendments. In places like Washington state, the law only applies to homes built after 2011, but an older house that’s being sold must get a detector before the transaction closes. In contrast, some rural counties only enforce the rule for new construction, leaving older homes in a gray area.
What does that mean for you? First, check your local building department’s website or give them a quick call. It’s usually a one‑minute question: “Do I need a hard‑wired CO alarm on the second floor?” Most officials love that you’re being proactive.
Quick checklist for local compliance
- Verify whether your jurisdiction requires hard‑wired, battery‑backed, or both types of detectors.
- Confirm if interconnection is mandatory – many newer homes already have it built into the smoke alarm wiring.
- Note any exceptions for historic or “grandfathered” homes; you may still want to install extra units for safety.
When you’re unsure, err on the side of caution. Installing a hard‑wired unit with a battery backup costs only a few dollars more and gives you peace of mind that you meet the strictest standard.
Now, let’s tie the legal language back to your floor plan. If your house has a basement furnace, a first‑floor garage, and a second‑floor master bedroom, you’ll need at least three detectors: one in the basement (or near the furnace), one on the main level close to the garage door, and one on the upper level within arm’s‑reach of the bedroom door. Add a fourth if you have a separate guest bedroom or a finished attic used for sleeping.
Remember, the goal isn’t to hit a target number; it’s to satisfy the code while covering every spot where CO could pool. Think of each detector as a safety net that catches a problem before it becomes a tragedy.
One last tip: write down the specific code references for your area (e.g., “2024 Washington Residential Code, § 403.1”). Keep that note in your home safety binder next to the detector test log. If you ever sell the house, those details show buyers you’ve done the legwork and can speed up the inspection process.
Bottom line: national standards give you the baseline—one alarm per level and near each sleeping area. Local codes fill in the gaps, telling you whether you need hard‑wiring, interconnection, or special placement rules. Align your plan with both, and you’ll have a solid answer to the lingering question, “how many carbon monoxide detectors do i need?” for your specific home.
Step 3: Calculate the Minimum Number of Detectors Required
Alright, you’ve mapped every fuel‑burning appliance and you know the code says one alarm per level and near each bedroom. The next question is simple math: how many detectors do you actually need to cover those spots without over‑buying?
Start with a floor‑by‑floor count
Grab that sketch you made in Step 1. Count each distinct level – basement, main floor, second floor, and any attached garage that’s part of the living space. For each level, you’ll need at least one detector. If a level has more than one sleeping zone (think a split‑level with two bedrooms), add another unit within 10‑15 feet of the second bedroom door.
Example: a two‑story house with an attached garage and a finished basement. That’s four levels, so you start with four detectors.
Layer on the sleeping‑area rule
Now look at the bedroom circles you drew. If a level already has a detector near the hallway, you might still need a second one if a bedroom is far from that spot – the alarm has to be close enough to wake you up. A good rule of thumb: any bedroom farther than 20 feet from the nearest detector gets its own.
Picture a split‑level where the master suite sits at the far end of the floor. The hallway detector is 25 feet away – that’s a gap. Add a second unit by the master door and you’re good.
Account for special zones
Some rooms deserve extra attention even if they’re not sleeping areas. A finished attic used for a guest room, a home office with a gas‑powered space heater, or a workshop with a gasoline‑powered generator each count as a “high‑risk” zone. If the code in your jurisdiction requires a detector within 10‑15 feet of any fuel‑burning source, you’ll need one there too.
Think of it like a safety net: the more places CO can originate, the more nets you spread out.
Do the quick math
Here’s a fast calculator you can run in your head:
- Start with one detector per level.
- +1 for each bedroom that sits more than 20 feet from the nearest detector.
- +1 for each separate high‑risk zone that isn’t already covered.
Let’s run it on a typical three‑bedroom home:
- Basement = 1
- Main floor = 1 (garage attached, so the same unit covers both)
- Second floor = 1
- Master bedroom far from hallway = +1
- Guest bedroom on second floor = +1
Total = 5 detectors. That might feel like overkill, but you’ve just followed the code and covered every breathing space.
Cross‑check with health facts
If you’re still wondering whether that extra unit is worth it, remember CO isn’t just a “nice‑to‑have” alarm. The Charleston health department explains the dangers of carbon monoxide, noting that even low‑level exposure can mimic flu symptoms and that seniors, children, and people with heart conditions are especially vulnerable. A single missed alarm could mean the difference between a quick evacuation and a serious health event.
That’s why we recommend erring on the side of extra coverage – it’s a small cost for big peace of mind.
Final checklist before you buy
• List each level of your home.
• Mark every bedroom and measure distance to the nearest detector.
• Identify any extra high‑risk zones (attic, workshop, garage).
• Apply the simple formula above.
• Write the final number on your safety binder and shop for that many UL‑listed units.
Once you’ve purchased the right amount, install them according to the placement guide, test each one, and set a monthly reminder. You’ll now have a concrete answer to the lingering question, “how many carbon monoxide detectors do i need?” – and a home that’s truly ready for whatever the season throws at it.
Step 4: Choose the Right Type of Detector for Each Location
Now that you know how many carbon monoxide detectors do i need, the next puzzle is figuring out which kind belongs where. Not every spot in your house calls for the same gadget, and picking the right type can mean the difference between a whisper‑quiet alarm and a loud, early warning.
Hard‑wired or battery‑powered?
Hard‑wired units pull power from your home’s electrical system and usually have a battery backup. They’re the go‑to for newer builds because they stay alive during a blackout and can be hard‑wired together so one alarm triggers them all. If your house already has a smoke‑alarm wiring loop, you’ll probably want to tap into that.
Battery‑powered detectors give you flexibility. They’re perfect for finished basements, detached garages, or rental units where you can’t run new wiring. A fresh 9‑volt or sealed lithium battery lasts about 10 years, so you only need to swap it when the unit chirps for low‑battery.
Which one feels right for a given room? Think about power reliability. In a garage where a power surge could fry a hard‑wired circuit, a battery‑only model is safer. In a bedroom upstairs, a hard‑wired, interconnected unit ensures you hear the alarm no matter where you are.
Smart vs. traditional alarms
Smart detectors talk to your phone. They can send a push notification, flash a light, and even integrate with a broader home‑security system. If you travel a lot or love seeing a status badge on your thermostat, a Wi‑Fi‑enabled model might be worth the extra dollars.
Traditional units are simple, reliable, and often cheaper. They sound the same loud beep you’ve heard in movies, and they don’t need an app update to work. For most homeowners, a mix works best: a smart unit in the main living area where you’re likely to see a phone alert, and a classic hard‑wired unit in each bedroom.
Consumer Reports ran a lab test on dozens of models and highlighted that both hard‑wired and battery‑powered detectors can meet UL standards, but smart features add a layer of peace of mind according to their testing.
Special zones need special detectors
Garages, workshops, and attached basements often host fuel‑burning equipment that can release CO faster than a furnace. For these high‑risk zones, look for detectors that are rated for “garage use” or have a higher sensitivity rating. Some models even include a built‑in digital readout that shows ppm levels – handy if you want to know whether a car idling in the garage is a problem.
If you have a wood‑burning stove or a portable gas heater in a living‑room nook, consider a detector that can be mounted on a wall rather than a ceiling. CO is heavier than air when it’s fresh, but it mixes quickly; a wall‑mounted unit stays closer to the source and can catch a leak before it rises.
Don’t forget the bedroom rule. Even if you already have a ceiling‑mounted unit on the floor, a second detector near the door can be a lifesaver for the night‑shift sleeper or a child’s room that’s farther than 20 feet away.
Quick checklist for choosing the right type
- Identify the power source you can use – hard‑wired if you have existing alarm wiring, battery‑only for flexible spots.
- Decide if you want smart alerts – useful in the main living area or if you’re often away.
- Match detector rating to the zone – “garage‑approved” or wall‑mount for stove areas.
- Make sure each unit is UL‑listed and has a 10‑year battery life or backup.
- Plan interconnection: one hard‑wired alarm can pull the others into action.
By pairing the right detector type with each location, you turn a list of numbers into a tailored safety network. It’s not just about “how many carbon monoxide detectors do i need”; it’s about making sure the right ones are listening in the right places, so you can breathe easy knowing every corner of your home is covered.
Step 5: Compare Detector Features and Prices in a Quick Table
Now that you’ve counted the rooms and figured out where each alarm belongs, the next hurdle is deciding which exact model to buy. It can feel overwhelming – there are dozens of specs, price points, and marketing buzzwords. The good news? You don’t need a PhD in fire safety to sort it out. Just line up the key features side‑by‑side, spot the gaps, and let the numbers guide you.
So, what should you actually be comparing? Think of it like a grocery list for peace of mind: sensor accuracy, power source, smart connectivity, and price. Those four columns cover most of what matters when you answer the big question, “how many carbon monoxide detectors do i need” and which ones actually protect those spots.
Feature cheat sheet
First, a quick rundown of the jargon you’ll see on product pages. An electrochemical sensor is the gold standard – it stays stable across humidity and temperature changes and won’t cry false alarms on household cleaning chemicals. That’s the kind of reliability Kidde highlights on its site.[1]
Next up, power. A hard‑wired unit with a battery backup keeps humming during a blackout, while a battery‑only model gives you the freedom to pop it into a finished basement or a detached garage without any wiring. If you love data, look for a digital display that updates every 15 seconds – the CO Experts PRO‑10 does exactly that.[2]
Finally, smart connectivity. Some alarms talk to your phone or integrate with a broader security hub. That’s handy if you travel a lot, but it also adds a few dollars to the sticker price. For most families, a simple hard‑wired unit paired with a smart unit in the main living area is the sweet spot.
Quick comparison table
| Feature | Example Detector | Price Range (USD) |
|---|---|---|
| Sensor type – electrochemical (most accurate) | Kidde 10‑Year Hard‑Wired CO Alarm | $30‑$45 |
| Power source – hard‑wired with battery backup vs. fully battery‑operated | CO Experts Home Safety PRO‑10 (battery‑only, portable) | $180‑$230 |
| Smart connectivity & digital readout | Ring‑compatible Kidde Smart CO Alarm (Wi‑Fi) vs. CO Experts PRO‑10 with backlit CO level display | $50‑$90 (smart) / $180‑$230 (digital) |
Take a minute to stare at the table. Does the price gap make sense for the features you actually need? If you’re only covering a bedroom and a garage, the basic Kidde unit will likely do the job. If you have a home office with a portable gas heater, the extra cost of the PRO‑10’s low‑level detection and real‑time readout could be worth it.
Here’s a simple decision flow you can run in your head:
1. Do you need a detector in a room that already has a hard‑wired smoke alarm? Go hard‑wired with a battery backup – it’ll interconnect automatically.
2. Is the detector going to sit in a spot that might lose power (garage, workshop, detached shed)? Choose a battery‑only model like the PRO‑10.
3. Do you want alerts on your phone or a visual CO level reading? If you’re a tech‑savvy family, the Kidde smart alarm or the PRO‑10’s digital display will give you that extra reassurance.
Remember, the goal isn’t to chase the most expensive gadget but to match the feature set to the risk profile of each location. In our experience at Home Security Ready, families that pair a hard‑wired unit on each level with a portable low‑level monitor in the garage walk away with the highest confidence and the fewest false alarms.
Once you’ve picked the models, jot down the exact price you see online, add a modest 10 % buffer for taxes and shipping, and you’ll have a clear budget before you even click “add to cart.” That way, the question “how many carbon monoxide detectors do i need” becomes a straightforward math problem rather than a guessing game.
Bottom line: a side‑by‑side table turns a maze of specs into a quick visual checklist. Use it, compare the three rows, and you’ll walk away knowing exactly which detector belongs where – and how much you’ll spend doing it.
Step 6: Install, Test, and Maintain Your Detectors Properly
So you’ve finally decided how many carbon monoxide detectors do i need and where they belong. Great—now comes the part that actually keeps you safe: getting those devices up, running, and staying reliable.
Ever wonder why a brand‑new alarm can sit on a shelf for months and then suddenly feel sluggish? It’s usually a matter of placement, testing, and a bit of routine TLC.
Mounting your detectors the right way
First, grab a ladder, a pencil, and the mounting bracket that came with the unit. You want the sensor about 5‑7 feet off the floor—high enough for CO to rise, but low enough that a bedroom door doesn’t block the sound.
Here’s a quick checklist:
- Place on an interior wall, at least 10‑15 feet from fuel‑burning appliances.
- Avoid corners where airflow stalls; a spot near the center of the room works best.
- Don’t install directly above a ceiling fan or near a drafty window.
- If you’re mounting in a garage, choose a model rated for “garage use” and keep it away from direct vehicle exhaust.
And remember: if your home uses hard‑wired alarms, turn off the breaker before you start. A quick snap of the wires into the back plate is all it takes.
Testing like a pro
Once the unit is up, press the test button. You should hear a loud, steady beep lasting about 30 seconds. If the sound is weak or doesn’t start, double‑check the battery (even hard‑wired units need a backup).
Do you have a digital read‑out? Some smart models flash a CO level while you’re testing; that’s a good visual cue that the sensor is alive.
Set a monthly reminder on your phone. A simple “CO test” alarm in your calendar is all you need to stay on track.
Maintenance routine that actually works
Cleaning, battery swaps, and lifespan checks are the three pillars of upkeep. Dust can coat the electrochemical sensor and dull its sensitivity. A soft brush or a gentle vacuum puff does the trick—no harsh chemicals.
R.S. Andrews breaks it down nicely: regular cleaning keeps false alarms at bay and extends detector life. Follow their advice and you’ll avoid the “chirp‑chirp‑replace” nightmare.
Battery life varies. Even if the unit still has power, replace the battery once a year—think of it like changing the batteries in your TV remote before a movie night.
Most detectors have a built‑in end‑of‑life warning after 5‑10 years. Mark the manufacture date (usually on the back) on a sticky note and stick that note on your fridge. When the date rolls over, swap the whole unit.
Here’s a 5‑step maintenance cheat sheet you can print and stick near your alarm:
- Press the test button monthly; listen for a clear, loud tone.
- Vacuum or brush the sensor surface quarterly.
- Replace batteries annually, even if the unit still shows green.
- Check the manufacture date; replace after the recommended lifespan.
- Inspect placement after any remodel—make sure nothing now blocks airflow.
Does this feel like a lot? Think of it like a car oil change: a few minutes now prevents a costly, dangerous incident later.
Real‑world example: the garage dilemma
Mike, a DIY enthusiast from Ohio, installed a battery‑only detector in his attached garage. Six months later, he noticed the alarm chirping intermittently. He cleaned the sensor, swapped the battery, and the chirps stopped. A month after that, the unit gave an end‑of‑life beep—he replaced it with a newer, garage‑rated model and saved himself from a potential carbon monoxide build‑up while his car idled.
That story underscores two points: dust and battery health matter, and don’t ignore the manufacturer’s lifespan.
Quick video tip (optional)
If you prefer a visual walk‑through, there’s a short YouTube clip that shows the proper ceiling‑mount technique: how to mount a CO detector correctly. No need to pause; the video runs under two minutes.
And finally, give yourself a pat on the back each time you finish a test. It’s a tiny habit that adds up to big safety.
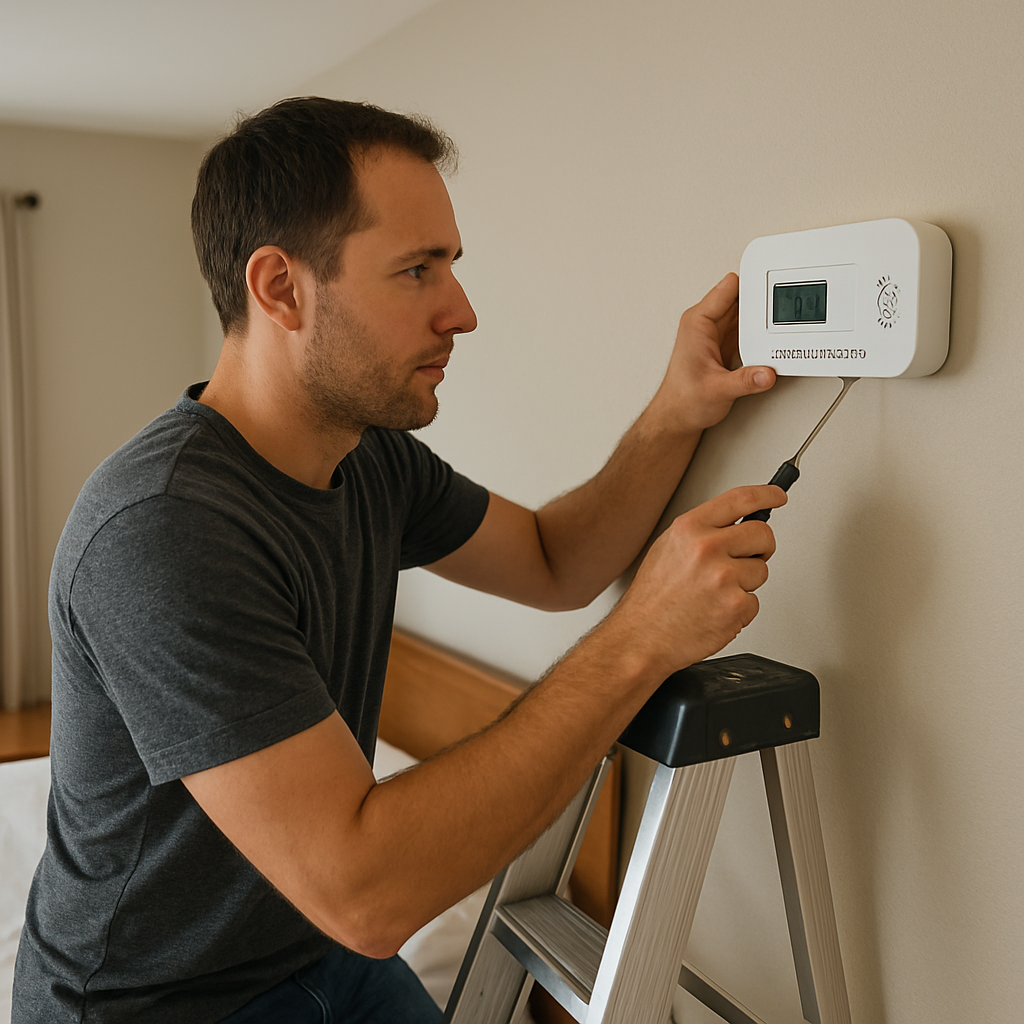
Bottom line: install the right way, test every month, clean and replace batteries yearly, and respect the sensor’s lifespan. Follow these steps and you’ll answer the question “how many carbon monoxide detectors do i need” with confidence, knowing each unit will actually protect you when it counts.
Conclusion
So, you’ve walked through the checklist, counted the levels, and picked the right type of detector. At this point the big question feels answered: how many carbon monoxide detectors do i need for my home?
The short answer is simple – one per floor, plus one within 10‑15 feet of every sleeping zone, and an extra unit for any high‑risk area like a garage or workshop. In most three‑bedroom houses that lands you at three to four detectors, but the exact number follows the layout you sketched.
Why does that matter? Because CO is silent until it isn’t. A detector that’s too far away can miss the buildup until it’s too late. That’s why we always tell readers to double‑check distances with a quick tape measure – if it’s more than 20 feet, add another alarm.
Now that you know the count, make it a habit. Test each unit monthly, wipe away dust, and swap the battery (or the whole unit) at the ten‑year mark. A quick calendar reminder saves you from a false sense of security.
And remember, safety isn’t a one‑time project. Whenever you remodel, add a new bedroom, or install a new furnace, revisit the placement rules. Treat your CO network like a living part of your home.
Ready to lock it in? Grab your list, buy the UL‑listed models that fit each spot, and give yourself a pat on the back each time the test button clicks. You’ve turned a vague question into a concrete safety plan.
FAQ
How many carbon monoxide detectors do I need for a single‑story home?
For a one‑level house you’ll want at least two units: one near the sleeping zone (typically by the bedroom door) and another on the main floor close to any fuel‑burning source such as a furnace or water heater. If the house has an attached garage or a finished basement, add a third detector within 10‑15 feet of those high‑risk areas. That simple rule covers the basics without over‑complicating things.
Do I need a detector in every bedroom?
Not every bedroom needs its own alarm, but each sleeping area must be within 10‑15 feet of a detector. Measure the distance from the bedroom door to the nearest unit; if it’s more than 20 feet, place an extra detector by that door. This ensures the alarm wakes you up in time, especially for larger homes where a single hallway unit might be too far away.
What’s the right distance between a detector and a fuel‑burning appliance?
The guideline is to keep detectors at least 10‑15 feet away from appliances like furnaces, stoves, or water heaters, but also no more than 30 feet. Too close and you risk false alarms from routine exhaust; too far and the sensor might miss a dangerous buildup. Aim for a spot on the same wall or ceiling that meets both distance limits and stays out of direct drafts.
Should I install detectors on each level if I have a basement?
Absolutely. The National Fire Protection Association calls for one alarm per level, and a basement counts as a level. Place a detector near the furnace or water heater in the basement, then another on the main floor and a third on any upper level. If the upper floor has multiple bedrooms spaced far apart, consider a fourth unit by the farthest bedroom door.
Are battery‑only detectors okay for my garage?
Battery‑only units work well in garages because power outages or a tripped breaker won’t silence them. Choose a model that’s “garage‑rated” – it’s built to handle temperature swings and vehicle exhaust. Just remember to swap the battery annually and test the alarm monthly; a fresh 9‑volt or sealed lithium cell will give you up to ten years of reliable service.
How often should I test my detectors and replace batteries?
Press the test button on each alarm once a month; you should hear a loud, steady beep for about 30 seconds. If the sound is weak, replace the battery right away, even if the unit still shows green. Most manufacturers recommend a full battery change once a year and a complete detector replacement every 5‑10 years, depending on the printed manufacture date.
What if my house is older and doesn’t meet the latest code?
Older homes often fall under “grandfathered” exceptions, but adding extra detectors never hurts. Start with the minimum – one per level and one by each sleeping zone – then add units near any high‑risk appliances or detached structures. Keep a simple checklist of where you’ve installed alarms; if you ever sell the house, that record shows you’ve gone the extra mile for safety.