

Picture this: you’re sitting on your couch, coffee in hand, and the doorbell rings. But instead of rushing to the door, you glance at your phone and see who’s there—without paying a monthly fee. That’s the promise of a video doorbell without subscription.
We get it, the idea of ongoing costs can feel like a hidden leash on your budget. When you sign up for a smart doorbell, the excitement often fades as you read the fine print: cloud storage, premium alerts, yearly renewals. It makes you wonder if there’s a simpler way.
In our experience at Home Security Ready, we’ve watched homeowners trade peace of mind for pricey plans, only to discover they could have kept the footage locally. Imagine storing video on a microSD card you already have, or streaming straight to your home Wi‑Fi without a cloud gatekeeper.
So, why does the subscription model dominate the market? Vendors tout endless storage and AI‑powered features, but many of those perks are overkill for everyday use. If you just want to see a delivery person or check on a curious cat, a basic system does the job just fine.
Here’s the sweet spot: a video doorbell that records to local storage, offers optional free app alerts, and lets you access live video whenever you need it. No hidden fees, no surprise bills at the end of the month.
Think about the moments that matter—your kids coming home from school, a neighbor dropping off a package, or a stray raccoon investigating the porch. With a subscription‑free doorbell, you capture those snippets instantly, and you own the footage outright.
But there are a few trade‑offs to keep in mind. Local storage means you need to swap the card every now and then, and you might miss out on advanced motion analytics that rely on cloud processing. Still, for most households, the cost savings outweigh the extra steps.
If you’re weighing options, ask yourself: do I need facial recognition and cloud history, or is a clear video feed enough? Most users find the latter more than sufficient, especially when privacy is a priority.
Choosing the right device also means checking compatibility with your existing smart home hub. A doorbell that plays nicely with Alexa or Google Assistant lets you hear who’s at the door without opening an app.
And here’s a little tip we’ve heard from fellow DIYers: set your motion sensitivity just right, so you don’t get alerts every time a leaf brushes the porch. A well‑tuned system feels like an invisible guard, not a noisy alarm.
Bottom line: a video doorbell without subscription puts control back in your hands, saves money, and still delivers the safety net you expect. It’s a practical choice for anyone who values simplicity over flashy extras.
Ready to explore the best subscription‑free models? Let’s dive in and see which devices strike the perfect balance between price, performance, and peace of mind.
A video doorbell without subscription lets you capture clear footage locally, avoid monthly fees, and keep your doorstep privacy intact while still delivering reliable alerts and two‑way talk. Now you can compare top subscription‑free models, weigh price versus performance, and choose the one that gives peace of mind without the hidden costs.
Understanding How Video Doorbells Work Without a Subscription
Ever wonder what actually happens inside a video doorbell when you skip the monthly plan? It’s not magic – it’s a blend of local processing, Wi‑Fi streaming, and a little on‑board storage that lets you see who’s at the door without handing over your footage to the cloud.
First off, most modern doorbells have a tiny computer – a system‑on‑a‑chip (SoC) – that runs a stripped‑down version of Linux or a proprietary OS. That chip handles three jobs: capturing video, detecting motion, and pushing a notification to your phone.
Local storage vs. cloud storage
When you opt out of a subscription, the device defaults to a microSD card (usually 32 GB to 128 GB). The camera writes short clips – often 30‑second loops – directly to the card. Once the card fills up, the oldest files get overwritten. It sounds old‑school, but it’s rock‑solid: you own the data, and there’s zero monthly fee.
Compare that to a cloud‑based plan where every motion event is uploaded to a remote server, and you pay per month for the bandwidth and storage. The trade‑off? Cloud gives you searchable archives from months ago; local storage only keeps what’s on the card right now.
How the video gets to your phone
The doorbell streams live video over your home Wi‑Fi using standard protocols like RTSP or a proprietary app feed. Your smartphone app opens a secure connection (HTTPS) to the doorbell’s IP address and pulls the live feed in real time. Because the stream stays within your network, latency is low – you see the visitor almost instantly.
Most devices also push a push notification via Apple Push Notification Service (APNS) or Firebase Cloud Messaging (FCM). The notification contains a tiny thumbnail and a link back to the live stream. No cloud needed; the message is routed directly from the doorbell to your phone.
Real‑world examples
Take the best home security products in 2024 roundup – the Ring Video Doorbell Battery and the Eufy Security Video Doorbell 2K both offer microSD slots for local storage. Users report swapping the card every two weeks when they have a busy porch, but the process is as simple as popping out the card and plugging it into a laptop.
Another example is the Wyze Video Doorbell (2023 model). It stores up to 14 days of motion clips on a 32 GB card, and the app lets you manually download any clip to your device. Homeowners love that they can back up the most important moments without a recurring bill.
Actionable steps to set up a subscription‑free doorbell
1. Choose a doorbell with microSD support. Verify the max card size in the specs.
2. Insert a high‑endurance card. Look for “A2” or “class 10” ratings; they handle constant rewriting better than standard cards.
3. Configure motion zones. In the app, draw boxes around the areas you care about (front steps, driveway) and lower the sensitivity for wind‑blown leaves.
4. Set up local notifications. Enable push alerts and make sure your phone’s notification settings allow them.
5. Schedule regular card checks. Once a month, plug the card into a computer and back up the clips you want to keep.
Tips from the field
We’ve seen a lot of DIYers forget to enable the “local only” mode, which can accidentally send footage to the cloud if the Wi‑Fi drops. Double‑check that the app’s cloud backup toggle is off.
Another nuance: some doorbells compress video heavily to fit more on the card, which can make facial details fuzzy. If you need clearer images (e.g., for identifying delivery drivers), pick a model that offers 1080p or 2K resolution even at the cost of shorter clip length.
Lastly, keep your doorbell’s firmware up to date. Manufacturers release patches that improve local storage handling and patch security holes. A quick weekly check in the app’s settings can save you a lot of headaches.
Understanding the nuts and bolts of a video doorbell without subscription demystifies the tech and shows you that you don’t have to trade privacy for convenience. With a little planning, you get instant alerts, reliable video, and zero recurring fees – just the way smart home security should feel.
Top Free Cloud Storage Options for Video Doorbells
So you’ve got a doorbell that records locally, but you still want a safety net in the cloud without paying a dime. Sound familiar? You’re not alone – many DIYers wonder if there’s a truly free cloud tier that doesn’t lock them into a pricey plan.
First, let’s clear up a common myth: “free” usually means limited. It’s not a marketing trick, it’s a technical reality. The cloud providers are happy to give you a taste – a few hours of video, basic motion alerts, maybe a single camera – just enough to prove the concept works.
Below is a quick rundown of the biggest players that actually offer a free cloud option today.
Free Cloud Tiers from Major Brands
Google Nest Doorbell (battery or wired) – Nest gives you three hours of video storage on the free tier, plus basic AI detection for people, packages and animals. It’s enough to catch a delivery or a quick visitor, and the clips stay in the app for up to 30 days before they disappear.
Ring Video Doorbell (Battery or Pro) – Ring’s free tier provides live view only; you won’t get cloud‑saved clips unless you upgrade. However, you still get instant push alerts, which many users find sufficient for day‑to‑day monitoring.
Blink Video Doorbell (2nd‑gen) – Blink includes a Sync Module Core that lets you store video locally for free. While it’s not a cloud service per se, the module backs up clips to your phone over Wi‑Fi without a subscription, giving you a hybrid free‑storage experience.
For a deeper dive into each brand’s free features, check out CNET’s comprehensive guide Best video doorbell cameras.
Now, before you sign up for any of these, ask yourself: how much footage do you actually need? If you only want to see who’s at the door for a few seconds, three hours of Nest storage might be perfect. If you need continuous recording, you’ll probably have to pair a free tier with a microSD card.
That video walks you through setting up Nest’s free tier step‑by‑step, so you can see exactly where the storage limit shows up in the app.
What to Look for in a Free Tier
- Storage window – How long do clips stay before they’re auto‑deleted?
- Resolution caps – Some free plans downgrade video to 720p to save bandwidth.
- AI features – Are basic motion alerts included, or do you need a paid plan for people‑vs‑packages detection?
- Device limit – Most free tiers lock you to a single doorbell; adding a second camera usually pushes you into a paid plan.
Keep an eye on these details, because a “free” label can hide hidden limitations that end up costing you time (and maybe a backup card) later on.
Tips to Maximize Free Storage
1. Trim motion zones. Narrow the detection area to just your front steps. Less motion means fewer clips, which stretches that three‑hour Nest window.
2. Enable low‑light mode only when needed. Night‑vision streams at higher bitrate; toggling it off during daylight saves space.
3. Regularly download key clips. Use the app’s export function to pull important footage to your phone or computer before it expires.
4. Pair with a high‑endurance microSD. Even if you rely on free cloud for most events, a 32 GB card can catch the occasional overflow without a subscription.
5. Check the app’s “cloud usage” tab. Both Nest and Ring show you exactly how much free storage you’ve used – treat it like a fuel gauge.
| Brand | Free Cloud Storage | Key Limitations |
|---|---|---|
| Google Nest | 3 hours total, retained up to 30 days | Limited to one doorbell, lower resolution on free tier |
| Ring | Live view only (no saved clips) | Requires subscription for any cloud video, push alerts still free |
| Blink | Free local storage via Sync Module (no cloud) | Cloud backup requires $4/mo, limited to 2‑AA battery power |
Bottom line: you can enjoy a “video doorbell without subscription” and still have a safety net in the cloud – you just have to pick the right free tier and play smart with motion settings. With a little tweaking, those three free hours from Nest or the live‑view freedom from Ring can be more than enough for most households.
Step-by-Step Setup for a Subscription-Free Video Doorbell
1. Pick a doorbell that plays nice with local storage
First thing’s first – you need a model that actually lets you drop a microSD card in the back. Look for specs that mention a 32 GB or larger slot and an “offline only” mode. Eufy, Ring (Battery) and Wyze all list a microSD slot, but double‑check the max card size before you buy.
2. Grab a high‑endurance microSD
Standard cards aren’t built for constant rewrites, so they’ll wear out after a few months. Choose a card rated “A2” or “Class 10” and marketed for video‑surveillance. Those little “high‑endurance” labels mean the card can handle 24/7 write cycles without corrupting your clips.
3. Mount the hardware
Turn off the circuit breaker for the doorbell’s power source – safety first. Most battery‑run units just need a few screws; wired models require a low‑voltage transformer (16‑24 V). Use a level, aim the lens about 45° down, and make sure the Wi‑Fi antenna isn’t blocked by metal.
Once the unit is snug, slide the microSD card into the slot (usually behind a small cover). You’ll hear a click; that’s the card locking into place.
4. Connect to your Wi‑Fi
Open the doorbell’s companion app and follow the “add device” wizard. Choose the 2.4 GHz band – it reaches farther than 5 GHz and gives a more stable feed for a small sensor like a doorbell. When the app asks about cloud storage, toggle the option off or select “local only.” This tells the firmware to keep every clip on the card instead of trying to upload.
5. Set up motion zones and sensitivity
In the app, draw a box around your front steps or driveway. Tightening the zone cuts down on false alerts from passing cars or swaying trees. Then dial the sensitivity down a notch; you’ll still catch a delivery person, but you won’t get a ping every time a leaf lands.
6. Enable push notifications (no cloud needed)
Even without a subscription you can get instant alerts. Turn on push notifications for “motion detected” and “doorbell rang.” The app uses Apple Push Notification Service or Firebase Cloud Messaging, so the alert travels straight from the doorbell to your phone – no middleman cloud storage required.
7. Test, then back up
Give the system a quick test: press the button, walk through the motion zone, and watch the live feed on your phone. If the clip appears in the app’s “local recordings” section, you’re good to go. Then, every few weeks, pop the microSD out and copy the files to a laptop or NAS. That way you keep the most important moments forever.
8. Optional: capture footage without a cloud plan
If you already own a Ring doorbell and don’t want to pay for a subscription, you can fall back on a screen‑recording workaround. The eufy guide walks you through using your phone or computer to record the live stream, which can be a handy stop‑gap until you swap to a fully local device screen recording workaround for Ring.
9. Keep firmware up to date
Finally, check the app’s settings at least once a month for firmware updates. Manufacturers often release patches that improve local storage handling and close security holes. A quick tap to “update now” can save you a lot of headaches later.
Follow these steps, and you’ll have a video doorbell without subscription that works reliably, respects your privacy, and saves you the monthly fee. It’s a little extra effort up front, but the payoff – full control over your footage – is well worth it.
DIY Alternatives: Using Local Storage and NVR Solutions
Ever felt that pang when your video doorbell starts asking for a monthly fee you never signed up for? Yeah, we’ve been there. The good news is you can keep the footage right at home, bypassing the cloud entirely, and still get the peace of mind you crave.
Local storage is more than a backup
When you pop a high‑endurance microSD card into a doorbell, the device writes short clips straight to the card. No “phone home” step, no extra latency. That means the video stays on your property even if the internet hiccups. The SafeHome guide on no‑subscription doorbells notes that local‑only models often include the same motion detection you’d get in a cloud‑based system – you just keep the files yourself.
But what if you want more than a 32 GB card can hold? That’s where a Network Video Recorder (NVR) comes in. An NVR gives you a dedicated hard‑drive pool, often measured in terabytes, and it can juggle streams from multiple cameras – doorbell included.
Choosing the right NVR for a doorbell
First, check that the NVR supports RTSP or the manufacturer’s proprietary stream. Most “no‑subscription” doorbells push a standard RTSP feed, which any decent NVR will swallow. If you already have a Synology or QNAP with Surveillance Station, you can add the doorbell as another camera node – no extra hardware needed.
Second, think about storage layout. A 2 TB drive, for example, will hold roughly two weeks of 1080p clips from a single doorbell that records 30‑second events every few minutes. If you plan to keep footage for months, consider a RAID‑1 or RAID‑5 array; it adds redundancy so a single drive failure won’t erase your history.
And here’s a practical tip: create a separate VLAN for all your security devices. One forum user shared how they isolated their doorbell, Reolink cameras, and NVR on a dedicated VLAN, keeping the rest of the home network untouched. It’s a simple firewall rule, but it dramatically reduces the attack surface. You can read the full discussion here.
Step‑by‑step: hooking a doorbell to an NVR
1. Pick a doorbell with RTSP output. Look for “local storage” or “no cloud” in the specs. Eufy, Wyze, and Lorex all expose an RTSP URL.
2. Assign a static IP. In your router, reserve an address so the NVR can always find the doorbell.
3. Add the stream to the NVR. In the NVR’s UI, choose “Add Camera,” paste the RTSP URL, set the resolution (1080p is a sweet spot), and enable motion‑triggered recording.
4. Configure motion zones. Most NVRs let you draw a box around the porch. Trim it down to avoid false alerts from passing cars or wind‑blown leaves.
5. Set up local alerts. Some NVRs push push‑notifications straight to your phone via their own app. If yours doesn’t, you can use Home Assistant or a simple webhook to get a “ding!” when motion is detected.
6. Schedule backups. Once a week, copy the NVR’s newest footage to an external drive or a cloud‑free NAS. That way you have an off‑site copy without paying a monthly bill.
Common pitfalls and how to avoid them
Power outages are the first thing that comes to mind. Most NVRs keep recording as long as they have power, but the doorbell itself might stop if Wi‑Fi drops. A UPS (uninterruptible power supply) for the NVR and a PoE injector for the doorbell keep everything humming during a blackout.
Second, don’t forget firmware. Both the doorbell and the NVR release patches that tighten security and improve stream stability. A quick check in the app or the NVR’s admin panel once a month saves you from nasty bugs.
Finally, be realistic about storage limits. If you notice the NVR’s disk filling up fast, lower the recording length or switch to motion‑only clips. You’ll still catch the important events without drowning in gigabytes of empty porch footage.
Bottom line: using local storage and an NVR lets you build a subscription‑free video doorbell system that’s as robust as a commercial setup, but without the recurring costs. It’s a little more hands‑on, but the control you gain – over privacy, over footage, over hardware choices – feels pretty rewarding.
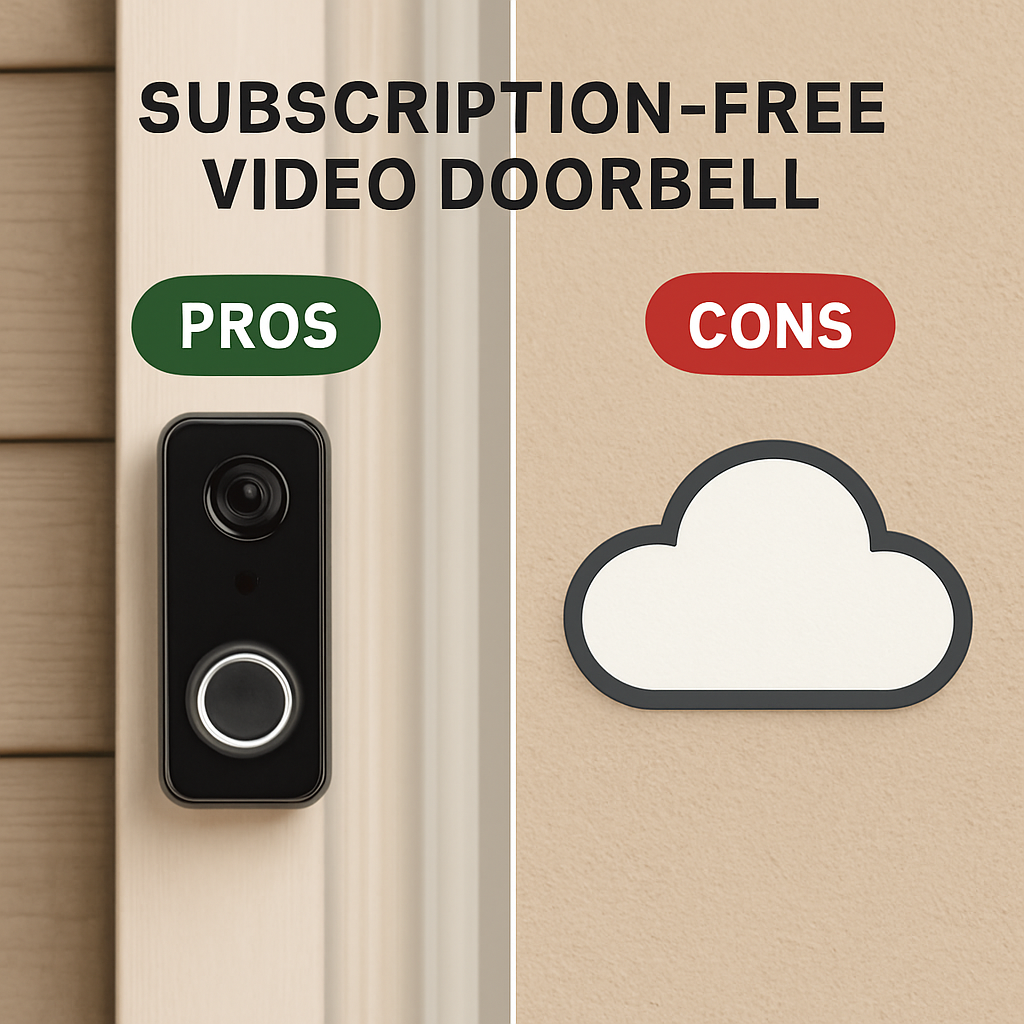
Pros and Cons: Subscription‑Free vs. Subscription‑Based Doorbells
Let’s get real for a minute. You love the idea of a video doorbell without subscription, but you also hear the hype about cloud‑powered features. So, what’s the true trade‑off?
Cost: The obvious line‑item
Subscription‑free models let you skip the monthly fee entirely. That’s a few bucks saved every month, which adds up to a nice chunk over a year. On the flip side, subscription‑based doors often bundle cloud storage, AI alerts, and sometimes even warranty extensions into that recurring cost.
Does paying a little each month feel like buying insurance? Maybe. But if you’re comfortable managing a microSD card or an NVR, the upfront price plus a one‑time card purchase can be far cheaper.
Privacy: Who’s watching your porch?
When you go subscription‑free, the footage stays on your device or local drive. No third‑party server gets a copy, which means fewer data‑leak worries. Subscription services store video in the cloud, meaning you’re trusting the vendor’s security practices.
Think about it this way: would you rather have a neighbor keep a spare key, or let a stranger have a digital key that never expires? The answer often leans toward keeping control yourself.
Feature set: What you get out of the box
Cloud‑based doors usually brag about facial recognition, package detection, and searchable timelines. Those features rely on powerful servers that can crunch video in real time. Subscription‑free units typically offer motion zones, two‑way talk, and basic alerts – solid basics, but without the AI polish.
Does that mean you’re missing out? Not necessarily. For most homeowners, knowing “someone is at the door” and being able to talk is enough. If you need to sift through weeks of footage for a specific face, a subscription might be worth the price.
Reliability: Internet vs. local network
Cloud doors need a steady internet connection to upload clips. A hiccup in your Wi‑Fi can delay notifications or even drop recordings. Subscription‑free devices stream live video locally and write clips to a card, so they keep working even if the internet goes down.
But remember: the doorbell itself still needs power and Wi‑Fi for live view. A UPS for your NVR or a PoE injector for the doorbell can bridge that gap if outages are a concern.
Maintenance: Hands‑on vs. set‑and‑forget
With a subscription, the vendor handles storage rotation, firmware updates (usually), and cloud backups. You just tap “install update” and keep going. Subscription‑free gear asks you to pop the card, back up clips, and occasionally replace the card when it wears out.
It sounds like extra work, but many DIYers enjoy the tactile control – it feels like caring for a pet, not a passive service. Plus, you can pair the doorbell with an NVR for longer‑term archiving without any extra fees.
Scalability: Adding more cameras
If you plan to expand to a full‑home system, a subscription can become pricey fast. Most plans charge per camera. Subscription‑free setups let you add more doors or cameras without inflating the bill – you only need more storage space.
That said, managing multiple local devices can get messy. A central NVR or Home Assistant hub can keep everything tidy, but it does require a bit of tech savvy.
Bottom line: Which side feels right for you?
Ask yourself three quick questions: Do you mind a modest monthly fee for AI‑powered features? Is absolute privacy a top priority? Are you comfortable handling a microSD card or NVR on a regular basis?
If you answered “yes” to the first and “no” to the others, a subscription‑based doorbell might be the smoother ride. If you’re leaning “no” on the fee, “yes” on privacy, and “okay” with a little hands‑on upkeep, the video doorbell without subscription wins.
In practice, many homeowners start with a subscription‑free unit, enjoy the cost savings, and later add a cloud tier for occasional deep‑search needs. It’s not an all‑or‑nothing world – it’s a spectrum you can move along as your needs evolve.
FAQ
Can I actually use a video doorbell without paying a monthly subscription?
Absolutely. Many manufacturers ship models that record straight to a microSD card or let you stream live video over your home Wi‑Fi without ever touching the cloud. The key is to enable the “local‑only” mode in the app during setup. Once that’s on, you get push alerts, two‑way talk, and recorded clips on the card – all without a recurring fee.
How does local storage work and which microSD card should I choose?
Local storage means the doorbell writes short video loops (usually 30 seconds) directly to the slot you install. Because the card is rewritten constantly, you need a high‑endurance card rated for continuous video‑surveillance – look for “A2” or “Class 10” and the “high‑endurance” label. A 32 GB card typically lasts a month of normal traffic; a 64 GB card gives you extra breathing room before you need to swap or back it up.
Will I miss out on AI features like package detection if I skip the subscription?
Most AI‑heavy features, such as person‑vs‑package detection or facial recognition, run on the vendor’s cloud servers. Without a plan, the doorbell will still send you a motion alert and a basic video clip, but it won’t label the event for you. If you only need to know “someone is at the door” and can glance at the live feed, the trade‑off is usually worth the saved dollars.
What if my Wi‑Fi drops – will I still get alerts or recordings?
The doorbell needs a network connection for live view and push notifications, but the actual recording stays on the microSD card even if the internet disappears. In a Wi‑Fi outage you won’t get a phone ping, but the device will keep buffering clips locally. Once the network is back, the app syncs the newest recordings so you won’t lose anything that happened while you were offline.
How often should I replace or back up the microSD card?
High‑endurance cards are built for thousands of rewrite cycles, but they do wear out over time. A good rule of thumb is to back up the card once a month – plug it into a laptop or use a USB reader and copy any clips you want to keep. If you notice the card heating up or occasional read errors, swap it out. Most users replace the card every 12‑18 months for peace of mind.
Can a subscription‑free doorbell still work with Alexa or Google Assistant?
Yes. The integration is handled at the smart‑home level, not the cloud storage tier. As long as the device is listed as “compatible” in the app, you can enable the Alexa or Google Assistant skill and ask, “Hey Google, show me the front door.” The voice assistant will pull the live stream from your local network, so you keep the convenience without paying for cloud video.
Is a subscription‑free doorbell secure enough against hackers?
Security comes down to a few basics: keep the firmware up to date, use a strong, unique Wi‑Fi password, and enable two‑factor authentication on the companion app if it’s offered. Because the footage never leaves your home network, there’s one less attack surface than a cloud‑centric system. Adding a VLAN for all security devices, as we’ve seen DIYers do, adds an extra layer of protection.
Conclusion
We’ve walked through everything from how the tech works to the real‑world pros and cons, and by now you probably feel a lot less intimidated by a video doorbell without subscription.
So, what’s the bottom line? You can get instant alerts, solid video quality, and full control over your footage without paying a monthly fee – as long as you’re willing to do a little hands‑on maintenance.
In our experience the most common mistake is forgetting to set the “local‑only” mode during setup. That tiny toggle is the difference between a truly subscription‑free system and one that secretly streams to the cloud.
Here’s a quick checklist to run through before you finish the install: confirm the microSD card is high‑endurance, enable push notifications, draw tight motion zones, and schedule a monthly backup.
Feel a pang of doubt about security? Remember that keeping firmware up to date, using a strong Wi‑Fi password, and, if you can, isolating the doorbell on its own VLAN, gives you a security posture that rivals many paid services.
And if you ever outgrow the local storage limits, you can always pair the doorbell with a free cloud tier or an NVR – the choice stays in your hands, not a provider’s.
Ready to take the plunge? Grab a compatible model, pop in a high‑endurance card, and enjoy peace of mind without the monthly bill. Your front porch, your data, your rules.