
Picture this: it’s a chilly winter night, you’re curled up on the couch, and the house is quiet except for the soft hum of the furnace.
Now imagine a silent threat slipping into the air, invisible but deadly, and you have no clue it’s there.
That’s exactly why carbon monoxide detector placement matters more than the sleek design of the unit itself.
In our experience at Home security Ready, we’ve seen homes where the detector was stuck in the garage and missed a furnace leak in the bedroom.
So, where should you actually put these life‑saving devices?
First, think about where you and your family spend the most time – bedrooms, living rooms, and any area near fuel‑burning appliances.
Place a detector on each level of the home, especially on the main floor and in the sleeping area, but keep it at least 15 feet away from bathrooms or kitchens to avoid false alarms.
If you have an attached garage, put a detector on the ceiling near the door, because carbon monoxide can drift from a running car into the house.
Don’t forget basements – they’re low points where gases settle, so a unit on the ceiling or high on the wall works best.
A quick checklist to keep in mind: one detector per floor, near sleeping spaces, at least 10‑15 feet from fuel sources, and mounted high on the wall or ceiling.
Why bother with all these details? Because a properly placed detector can give you precious minutes to get everyone out before the invisible poison does its damage.
Ready to make your home safer? Let’s walk through the exact spots you should cover, step by step, so you never have to guess again.
By the end of this guide you’ll know exactly where to mount each carbon monoxide detector placement for maximum protection, no matter the size of your house.
TL;DR
Proper carbon monoxide detector placement saves lives by giving you precious minutes to escape before the invisible poison builds up before it reaches dangerous levels.
Follow our step‑by‑step guide to install detectors on each level, near sleeping areas, and away from fuel sources, ensuring your home stays safe and sound.
Step 1: Identify High‑Risk Areas for Detector Placement
Ever walked into a room and thought, “Is the furnace still running?” That uneasy feeling is exactly why we start by hunting down the spots where carbon monoxide loves to hide. Think of these places as the silent trouble‑makers that could turn a cozy evening into a panic.
First up, the obvious: any space with fuel‑burning appliances. That means kitchens with gas stoves, utility rooms housing water heaters, and garages where a car might idle. But don’t stop there – basements, crawl spaces, and even attached sheds can become low‑lying pockets where the gas settles.
Map Your Home’s Risk Zones
Grab a pen and sketch a quick floor plan. Mark each furnace, boiler, fireplace, and any portable generator. Then, draw a radius of about 15‑feet around each source. Those circles are the zones you’ll want to stay clear of when mounting a detector.
Why the distance? Because a detector placed too close to a fuel source can trigger false alarms every time you fire up the stove, and nobody wants that constant nag.
Next, think about where you actually breathe. Bedrooms, living rooms, and home offices are high‑traffic zones. If a detector is on the same level as your sleeping area, it’ll give you those crucial minutes to get out before the CO level becomes dangerous.
Here’s a quick sanity check: does your home have an attached garage? If yes, position a detector on the ceiling near the garage door – carbon monoxide is lighter than air and will drift up and out, but a ceiling‑mounted unit will catch it early.
And remember, basements are natural sinks for gases. Mount a detector high on the wall or directly on the ceiling, but keep it at least 10‑feet away from any water heater.
When you’re done mapping, you’ll see a pattern emerge – the high‑risk zones cluster around fuel sources, while the high‑traffic zones cluster where you and your family spend time. That’s the sweet spot for placement.
For a deeper dive into overall home safety, check out our comprehensive guide to home safety. It walks you through every room, so you never miss a hidden danger.
Smart‑Home Angle
If you’ve already got a smart hub, you can tie the detector into your automation system. That way, when CO levels rise, you get a push notification on your phone, not just an audible beep.
Companies like Smart Citizens specialize in integrating safety devices into a unified smart‑home experience, so you can silence the alarm and still know something’s wrong.
Watch the short video above for a visual walk‑through of how a detector’s sensor actually detects CO and why placement matters.
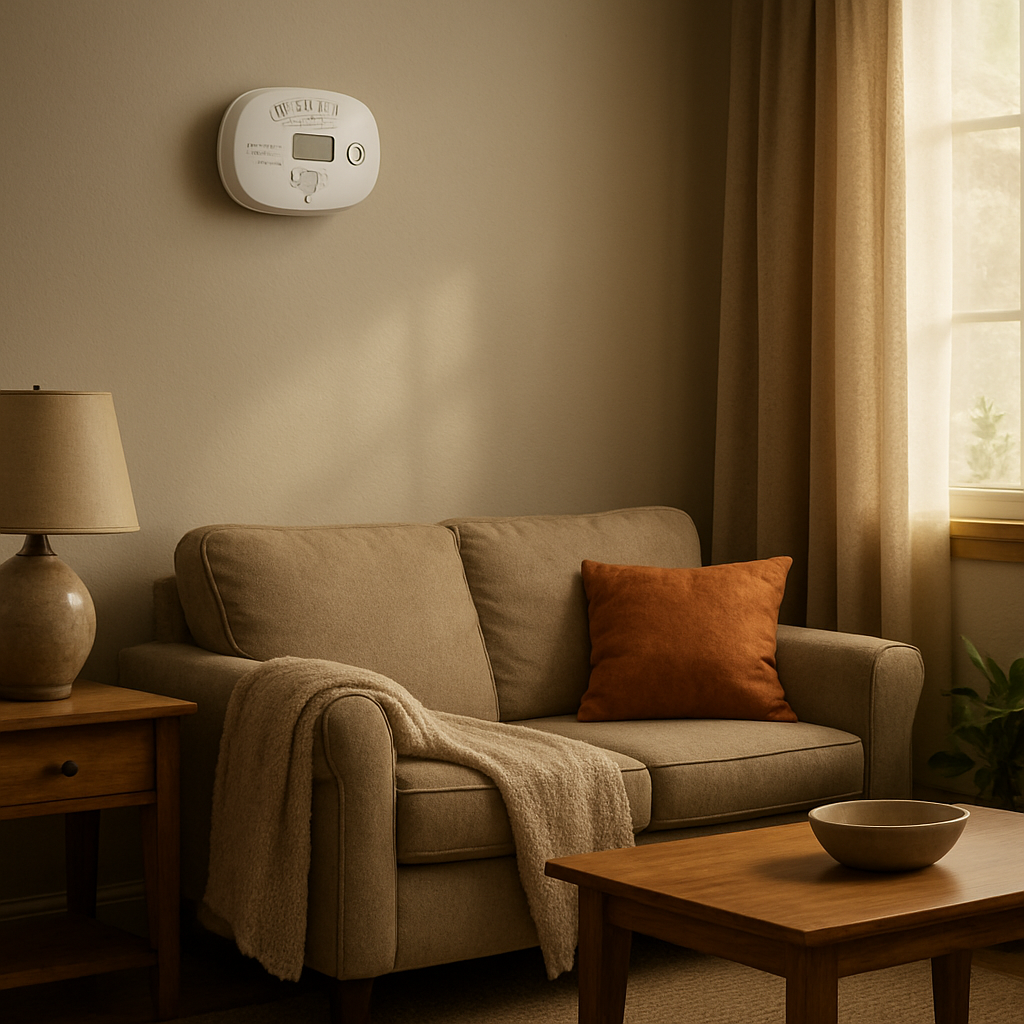
After you’ve identified the hot spots, it’s time to think about the installation process. If you’re handy, a simple 9‑volt battery unit can be screwed in place with a drill. For hard‑wired models, you might want a professional.
That’s where GL Lewis Construction can step in. Their crew knows the building codes inside out and can safely run low‑voltage wiring to power your detectors without compromising structural integrity.
Finally, give yourself a quick sanity test: walk through each room, pause near every fuel source, and ask, “If CO leaked here, would this detector catch it in time?” If the answer is yes, you’re set. If not, adjust the spot a few feet up or down until you’re confident.
By the end of this step, you should have a clear, room‑by‑room map of where to mount each carbon monoxide detector. It’s a small investment of time that pays off with peace of mind every time you turn the key in the ignition or light the stove.
Step 2: Choose the Right Type of Detector for Each Location
Now that you’ve mapped out the high‑risk zones, the next question is: what kind of carbon monoxide detector belongs in each spot? Not every detector is created equal, and picking the right style can mean the difference between a quick warning and a missed alarm.
Know Your Options
Broadly speaking, you’ll run into three families of units:
- Battery‑only detectors – portable, easy to install, perfect for places without easy power.
- Plug‑in models – draw power from an outlet but still have a backup battery for power outages.
- Hard‑wired detectors with battery backup – require professional wiring but stay alive even if the lights go out.
Some brands also bundle smoke and CO sensors in a single unit. That can save space, but remember: the sensor that triggers the alarm for CO is a different technology than the one that senses smoke, so performance can vary.
Match Detector Type to Location
Let’s walk through the rooms you’ve already highlighted and decide which model fits best.
Bedrooms & Sleeping Areas
Here you want reliability above all. A hard‑wired detector with a battery backup gives you continuous power, and the loudest alarm – crucial when you’re deep in dreamland. If running new wiring feels like a chore, a battery‑only unit placed on the wall about 5 feet above the floor does the job, just remember to swap the battery yearly.
Living Rooms & Family Zones
These spaces usually have outlets nearby, so a plug‑in detector works nicely. The backup battery kicks in during a blackout, and you won’t have to drill holes in the wall. Keep it at least 10 feet away from fireplaces or gas stoves to avoid nuisance beeps.
Garages & Attached Workshops
Garages are prone to CO spikes from idling cars. Because a garage can be a bit damp, a sealed, hard‑wired unit with a robust backup battery is the safest bet. If you’re renting or can’t touch the wiring, a battery‑only detector that mounts on the ceiling (you’ll need a small drill) is acceptable – just test it often.
Basements & Crawl Spaces
Moisture is the enemy of electronics down there. Look for a detector rated for high humidity or a sealed hard‑wired model that you can mount on the ceiling corner opposite the furnace. The extra battery backup is a lifesaver if a power outage follows a CO leak.
Near Fuel‑Burning Appliances
When you’re within 5–20 feet of a furnace, water heater, or gas stove, a battery‑only unit is often recommended. The sensor sits right where the gas might rise, and you avoid the heat that could stress a plug‑in cord.
Does this feel overwhelming? Take a breath – you’re really just matching three variables: power source, environment, and how often you’re willing to do maintenance.
Quick Decision Checklist
- Is the area always powered? Go hard‑wired.
- Is the space dry and easy to reach? Plug‑in works.
- Do you need a truly portable solution? Battery‑only.
- Will the detector sit near a heat source? Choose a battery‑only or a model rated for high temperature.
When you’ve picked the right type, the installation is usually a matter of a few screws and a test button.
Speaking of testing, here’s a quick visual guide that walks you through the process.
After the video, give each unit a firm press on the test button. If you hear a clear, ear‑piercing beep, you’re good to go. If the sound is weak, double‑check the mounting height or the battery. Remember, a detector that’s too close to a vent might never hear the alarm, and one that’s too high could miss the rising CO plume.
Bottom line: there’s no one‑size‑fits‑all detector. By aligning power source, environment, and maintenance comfort with each location, you create a layered safety net that works even when you’re fast asleep.
Step 3: Install Detectors at the Correct Height and Distance (Video)
We’ve just watched the quick video that shows the test button, now it’s time to get those units up where they can actually hear a leak.
Why height matters
Carbon monoxide mixes with air and rises with warm air, so the sweet spot is around knee‑level – about 3‑5 feet off the floor – which lines up with the breathing zone of a sleeping person.
Carrier recommends placing the detector at least five feet above the ground and away from curtains, vents, or direct drafts. That way the sensor stays in the clean plume of CO rather than getting distracted by a gust of cool air.
Step‑by‑step mounting guide
1. Pick the spot. Walk around the room, hold the detector at knee height, and imagine where a rising CO plume would pass. Typical spots are the wall opposite a furnace, the center of a bedroom ceiling, or the wall just inside an attached garage.
2. Check the clearance. Keep the unit at least 15 feet away from fuel‑burning appliances to avoid nuisance alarms, but no more than 30 feet from the likely source so you don’t miss a slow leak.
3. Mark and drill. Use a pencil to mark the mounting holes, then drill a small pilot hole. Most detectors come with two screws; a simple screwdriver does the trick.
4. Secure the base. Snap the mounting bracket onto the wall, then tighten the screws until the base feels solid but don’t over‑tighten – you don’t want to crack the plastic.
5. Hang the detector. Slide the unit onto the bracket until you hear the click. Give it a gentle tug to be sure it’s locked in.
6. Test it. Press the test button. If you get a loud, ear‑piercing beep, you’re good. If the sound is weak, double‑check the mounting height or the battery.
Distance dos and don’ts
- Don’t mount directly above a bathroom vent – moisture can short‑circuit the sensor.
- Don’t place it behind a heavy piece of furniture; CO needs a clear path to reach the detector.
- Do install one on each level, especially near sleeping areas, because CO spreads differently depending on house layout.
- Do consider ceiling‑mounting in basements where the gas pools low; a detector on the wall at knee height works better in that environment.
What if you have a high‑ceiling living room? Hang the unit on the wall at the recommended knee height rather than on the ceiling. The sensor will catch the rising gas sooner, and you’ll avoid the echo‑eyed “won’t hear it up there” myth.
And what about pets? If you have curious cats or dogs that love to bat at things, move the detector up to chest height or place it where they can’t reach. The sensor still sits within the CO plume, but you won’t get a furry‑foot‑induced false alarm.
Quick sanity check before you step back:
- Is the detector 3‑5 feet off the floor?
- Is it at least 5 feet away from curtains, vents, and direct drafts?
- Is it 15‑30 feet from the nearest fuel‑burning appliance?
- Did you hear a loud beep after testing?
If you answered “yes” to all of those, you’ve nailed the placement. Remember, a properly positioned detector can give you those precious minutes to get everyone out before CO reaches dangerous levels.
In our experience at Home security Ready, homes that follow these height and distance rules see far fewer nuisance alarms and a higher chance of early detection when a real leak occurs. It’s a small effort for a big peace of mind.
Step 4: Connect Power, Test, and Verify Alarm Functionality
Okay, you’ve got the detector hanging at the sweet spot – now it’s time to give it life and make sure it shouts when it should. Power, testing, and verification sound like three chores, but we’ll break them down into bite‑size steps so you can breeze through them without pulling your hair out.
Power up: Choose the right source for the room
First off, ask yourself: does this spot have an outlet nearby, or would a hard‑wired run be worth the extra effort? The three main options are battery‑only, plug‑in with battery backup, and hard‑wired with backup battery. Each has a trade‑off.
Battery‑only units (like First Alert’s CO400) give you flexibility – you can mount them on a wall, a shelf, or even a ceiling bracket without worrying about cords. The downside? You have to remember to swap the battery at least once a year.
Plug‑in models (such as the CO606) pull power from an outlet but keep a small battery inside so the alarm still works during a blackout. They’re perfect for living rooms or home offices where an outlet is within arm’s reach.
Hard‑wired detectors (think CO511) require a qualified electrician, but once they’re in, you never think about power again. The built‑in battery kicks in if the house loses electricity, which is exactly what you want when a furnace fails and the power flickers.
Step‑by‑step: Connect and mount
1. Turn off the breaker. If you’re going hard‑wired, safety first – flip the circuit breaker for the room.
2. Strip the wires. You’ll see a black (hot), white (neutral), and green or bare copper (ground). Match them to the detector’s terminals – most units are color‑coded.
3. Secure the mounting bracket. Use the screws that came with the alarm, drill pilot holes if you’re into wood studs, and make sure the bracket sits flush.
4. Attach the detector. Snap it onto the bracket, give it a gentle tug, and you should hear a faint click.
5. Restore power. Flip the breaker back on and watch the LED pulse – that’s the unit telling you it’s alive.
If you’re using a plug‑in or battery unit, just plug it in (or pop in a fresh 9‑V battery) and you’re done. No breaker, no wires, just a quick “click” and you’re ready for the next step.
Testing the alarm: What you should hear
Press the test button. A well‑functioning CO alarm will emit a loud, ear‑piercing beep that lasts at least 15 seconds. If the sound is weak or muffled, double‑check the mounting height – a detector tucked behind a curtain or too close to a vent can deaden the alarm.
Many newer models, like First Alert’s digital CO710, also flash a red LED and show the CO level on a small display. Those visual cues are handy if you have hearing‑impairment in the household.
Pro tip: after the initial test, press and hold the button for 5 seconds. Some units will emit a secondary tone that confirms the internal speaker is still healthy – a quick sanity check you can do every month.
Verify ongoing functionality
Beyond the monthly button press, keep an eye on the battery indicator. Battery‑only and plug‑in units usually have a tiny “low‑bat” light that glows amber when it’s time for a change. If you see it, replace the battery immediately – a dead battery is the single biggest reason a CO alarm fails when you need it most.
For hard‑wired detectors, schedule a semi‑annual visual inspection. Look for dust buildup around the sensor; a soft brush can clear it without damaging the internals.
And don’t forget the “end‑of‑life” date. Most CO alarms have a 5‑ to 10‑year lifespan. After that, the sensor’s sensitivity degrades, and the manufacturer will label the unit “replace now.”
Common pitfalls & quick fixes
- Placing the detector directly above a bathroom exhaust fan can cause false alarms because the fan pulls in cooler air that confuses the sensor.
- Mounting too close (<10 ft) to a gas stove will often trigger nuisance beeps when you’re cooking. Move it a little farther out or switch to a battery‑only model that you can place higher on the wall.
- Using an old battery in a plug‑in unit defeats the backup function. Keep a spare 9‑V on hand and rotate it every six months.
By following these steps, you turn a simple CO detector into a reliable guardian that’ll sound the alarm before carbon monoxide becomes a silent threat.
| Power Source | Installation Effort | Best Use Cases |
|---|---|---|
| Battery‑only (e.g., First Alert CO400) | Minimal – just mount and insert battery | Bedrooms, rental units, spots without nearby outlets |
| Plug‑in with battery backup (e.g., CO606) | Simple – plug in, then mount bracket | Living rooms, home offices, areas with accessible outlets |
| Hard‑wired with backup battery (e.g., CO511) | Highest – requires electrician and wiring | Garages, basements, any location where power loss is likely |
For a deeper dive on the different detector models and their features, check out First Alert’s CO alarm lineup. And if you’re managing a rental property, the Colorado Department of Housing’s new alarm requirements give a clear checklist on compliance here.
Step 5: Placement Strategies for Multi‑Level Homes
When you’ve got more than one story, you can’t just toss a single carbon monoxide detector in the hallway and call it a day. The gas has a sneaky way of drifting upward, and each level of your house can become its own little pressure cooker.
So, how do you keep every floor safe without turning your home into a maze of beeping boxes?
One detector per floor – the rule of thumb
The EPA’s official guidance says each floor needs its own detector. That means a two‑story house gets two, a three‑story house gets three, and even finished basements count as a separate level.
Why? A detector on the second floor won’t hear a leak that’s happening on the first floor until it’s already spread. Think of it as giving every room its own watchdog.
Ideal height and mounting spot
Carbon monoxide rises with warm air, so you want the sensor at “knee‑level” – about 4 to 6 feet off the floor. That’s the sweet spot where the gas will pass through while you’re sleeping or cooking.
Mount it on a wall, at least 5 feet above the floor, and keep it at least 15 feet away from any fuel‑burning appliance. The state fire marshal’s installation recommendations echo this distance to avoid false alarms from cooking fumes.
Don’t stick it on a ceiling fan or a low shelf – the sensor needs a clear path to the air.
Where to put them on each level
Start with the bedroom or sleeping area on that floor. If you have a master suite, that’s the prime real estate. A detector right outside the door, but not directly in the doorway, catches the gas before it reaches you.
If the floor has a dedicated living room, place another unit on the opposite wall, about 10 feet from any fireplace or gas stove. For basements, mount the detector on the ceiling near the furnace, but stay clear of the direct vent pipe.
And if you have a finished attic or a loft, treat it like its own floor – a detector up there can save you from a furnace that’s tucked away in the crawl space.
Special spots that need extra love
Attached garages are a classic culprit. Hang a detector on the wall just inside the garage door, about 6 feet up. That way, any exhaust that sneaks back into the house gets caught early.
Do you have a secondary heating system, like a wall‑mounted space heater? Give it its own detector on the same wall, but keep a 10‑foot buffer between the heater and the sensor.
For homes with a fireplace, mount the detector at least 10 feet away from the chimney opening. The heat plume can trick a low‑mounted sensor into false alarms.
Quick checklist for multi‑level placement
- ✔️ One detector per floor (including finished basements and attics).
- ✔️ Mount 4‑6 feet above the floor, on a wall, not a ceiling.
- ✔️ Keep at least 15 feet from fuel‑burning appliances.
- ✔️ Install near sleeping areas and on opposite walls of living spaces.
- ✔️ Add a unit just inside any attached garage door.
- ✔️ Test each detector monthly and replace batteries yearly.
That list might look long, but you’ll only spend a few minutes installing each unit. And once they’re up, you’ve turned a potential silent killer into a harmless alarm that can buy you precious minutes.
Still wondering if you’ve covered every nook? Grab a flashlight, walk each floor, and imagine where a leak would drift. If you can’t see a spot, you probably don’t need another detector.
Remember, the goal isn’t to flood your home with beeping devices – it’s to give every breathing zone a chance to hear the warning before the gas does.
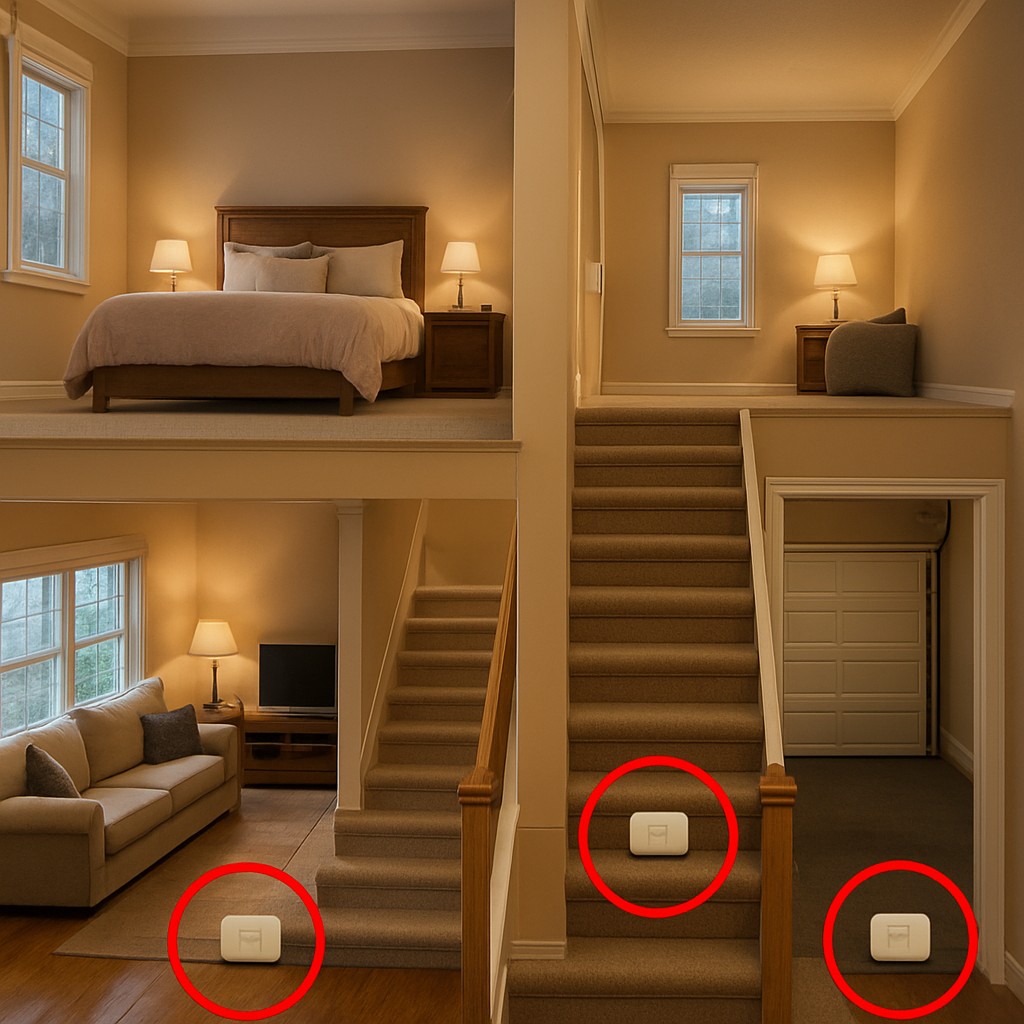
With these strategies, you’ll sleep soundly knowing each level of your house has its own early‑warning system. No more guessing, just solid, step‑by‑step protection.
Step 6: Ongoing Maintenance, Replacement, and Seasonal Checks
Now that every room has a detector, the real work begins: keeping those devices alive year after year.
Carbon monoxide doesn’t care about holidays, so your upkeep routine can’t either. Below is a step‑by‑step playbook that turns a set‑and‑forget mindset into a reliable safety habit.
Create a maintenance calendar
Grab a cheap wall calendar, a phone reminder, or the scheduling feature in your smart thermostat and block out three recurring dates: a monthly button‑press, a seasonal visual inspection, and a yearly battery‑or‑unit‑swap.
Because the test button is the quickest health‑check, set a reminder for the first Saturday of every month. When the alarm sounds, you’ll know the speaker, battery, and sensor are all still talking to each other.
Monthly test routine
1. Press and hold the test button for 5 seconds.
2. Listen for the full‑volume beep (at least 15 seconds).
3. If the sound is weak, double‑check the mounting height or clean dust from the sensor opening.
4. Reset the unit by turning it off, waiting ten seconds, then turning it back on.
A quick tip we hear often from Hetter’s NATE‑certified technicians: after you’ve pressed the test button, give the unit a gentle shake. The internal sensor isn’t a moving part, but the motion can dislodge a tiny dust particle that might be muffling the speaker.
Seasonal visual inspection
Spring and fall are perfect windows to walk the house with a flashlight. Look for three red flags: cracked housings, corrosion around the mounting screws, and any moisture buildup near bathrooms or basements.
If you spot condensation on the front panel, wipe it with a dry cloth and consider moving that detector to a drier spot. In our experience, a detector placed too close to a bathroom exhaust can lose its ability to hear a CO plume during the winter heating season.
Battery or unit replacement schedule
Most manufacturers stamp a five‑year life‑span on the back of the alarm. Even if the battery indicator is still green, schedule a full replacement at the five‑year mark. The sensor degrades slowly, and a fresh unit guarantees the sensitivity your family relies on.
When you buy a new detector, write the install date on the side of the case. That tiny habit saved dozens of homeowners from a surprise “low‑battery” chirp in the middle of a night shift.
Integrating checks with HVAC service
If you already have an annual furnace tune‑up, ask the technician to peek at your CO alarms. professional carbon monoxide alarm installation services often include a brief functional test and a visual inspection of every detector on the property.
Their experts will also confirm that each detector sits the recommended 4‑6 feet off the floor and at least 15 feet from fuel‑burning appliances, a detail that DIY installers sometimes overlook.
What to do when an alarm sounds
First, get everyone outside to fresh air—doors, windows, and the garage door wide open. Then call 911 and mention “possible carbon monoxide exposure.” Do not re‑enter until a qualified professional has cleared the home.
After the incident, replace every alarm that sounded, even if the battery looks fine. The sensor may have been exposed to a dangerous concentration and could be less reliable afterward.
Quick checklist you can print
- Test button pressed monthly – listen for full‑volume beep.
- Visually inspect housing each season – check for cracks, moisture, dust.
- Replace batteries or entire unit at the one‑year (battery) and five‑year (sensor) marks.
- Include alarm checks in your annual HVAC service appointment.
- Keep a log of install dates, battery changes, and test results.
Print this list, tape it to the inside of your pantry door, and you’ll never forget a step.
Sticking to this maintenance rhythm turns a simple carbon monoxide detector into a lifelong guardian. It costs a few minutes a month, but it buys you—and your loved ones—peace of mind for years to come.
FAQ
Where should I place carbon monoxide detectors in a two‑story home?
In a two‑story house you’ll want at least one detector on each level, preferably near sleeping areas. Mount it on the wall about 4‑6 feet off the floor, at least 15 feet away from furnaces, water heaters, or gas stoves. In the upstairs bedroom put the unit just outside the door, and on the main floor place another near the living‑room wall opposite the furnace. This layout catches rising CO before it reaches anyone’s breathing zone.
Can I install a detector in the garage, or should it stay inside?
Yes, you can and should put a detector inside an attached garage, but keep it on the interior wall, about 6 feet up, right where the garage door meets the house. That way any exhaust that sneaks in is caught before it drifts into living spaces. Avoid ceiling‑mounting in the garage because the high heat can shorten the sensor’s life, and never place it directly over a car‑bay where oil fumes could cause false alarms.
What’s the best height for a carbon monoxide detector in a basement?
Basements tend to be cooler, so CO can linger low. Mount the unit on the ceiling corner opposite the furnace, or on a wall at knee‑level (around 4‑5 feet). Keep it away from the direct vent pipe and any damp patches, because moisture can interfere with the sensor. A ceiling‑mounted unit works fine if the space is well‑ventilated, but a wall mount gives you a clearer line of sight to the rising gas plume.
Do I need a detector in a home office that only has a plug‑in model?
If the office shares the same heating system as the rest of the house, a detector on that floor already covers it. However, if the office has its own gas‑powered equipment—like a space heater—or you just want extra peace of mind, a battery‑only detector on the wall near the desk (again 4‑6 feet up) is a cheap, hassle‑free add‑on. Plug‑in models work too, as long as they have a backup battery for power outages.
How far away should a detector be from a fireplace or wood‑burning stove?
Keep the alarm at least 10‑15 feet from any fireplace, wood‑burning stove, or direct vent. Those appliances can produce short‑term spikes that trigger nuisance alerts, especially during the first few minutes of a fire. Position the unit on a side wall rather than directly above the chimney opening, and make sure there’s no draft blowing air straight from the stove toward the sensor.
Is it okay to mount a detector behind a piece of furniture?
Not really. CO needs an unobstructed path to reach the sensor, and a bulky bookshelf or TV stand can create dead zones where the gas pools. If you have limited wall space, try a low‑profile, battery‑only model that you can place on a high shelf—just keep it at least 3 feet away from the edge. The key is clear airflow, not hiding the device.
How often should I check the placement after moving furniture or renovating?
Whenever you rearrange large furniture, install new shelving, or finish a remodel, do a quick sanity check. Make sure the detector is still at the recommended 4‑6‑foot height and not blocked by curtains, vents, or décor. Run the test button to confirm the alarm sounds loud and clear. If anything looks off, adjust the mounting spot before the next monthly test—small tweaks now prevent a missed alert later.
Conclusion
We’ve walked through everything from picking the right detector type to nailing the perfect height on each floor. By now you should feel confident that a few simple tweaks can turn a silent threat into a loud, life‑saving alarm.
So, what’s the next step? Grab a screwdriver, mark the knee‑level spot on the wall of every bedroom, and press that test button. If the beep is strong, you’re set. If it’s weak, double‑check the clearance from vents or furniture – a tiny adjustment can make all the difference.
Remember, carbon monoxide detector placement isn’t a one‑time project. Seasonal checks, battery swaps, and a five‑year sensor replacement keep the system humming. Treat those monthly tests like a quick coffee break; it only takes a minute and could save a life.
In our experience at Home security Ready, homeowners who follow the checklist we’ve outlined see far fewer nuisance alarms and far more peace of mind. If you ever feel unsure, revisit the quick‑reference checklist we’ve compiled – it’s right there in the article.
Finally, share what worked for you with friends or family. A simple conversation could be the reason someone else avoids a dangerous CO buildup. Stay safe, stay alert, and let your detectors do the watching today.