
Picture this: you hear a faint click late at night, and your heart skips a beat because you realize the front door isn’t as solid as you thought.
We’ve all been there—thinking the deadbolt alone is enough, only to discover a thin metal plate giving way under a little pressure. That’s where deadbolt strike plate reinforcement steps in, turning a flimsy entry point into a sturdy barrier.
In our experience at Home security Ready, the simplest upgrade can make the biggest difference. By bolting a heavy-duty strike plate and using longer screws that reach the door frame’s studs, you add a layer of resistance that would stop a pry bar in its tracks.
But why does this matter? A burglar’s first move is usually to kick or lever the door, and the strike plate is the first line of defense. If it’s weak, the whole lock system is compromised, no matter how high‑grade your deadbolt is.
So, what does reinforcement actually look? Think of a reinforced strike plate as a reinforced steel plate, often 2 mm thick, with widened tabs that sit flush against the jamb. The longer 3‑inch screws bite into the wood, anchoring the plate into the solid framing rather than just the thin veneer.
Imagine you just moved into a cozy bungalow with charming windows but an older door frame. You love the place, but the thought of a break‑in keeps you up. Swapping the standard 1‑inch screws for longer ones and installing a heavy‑gauge strike plate is a weekend project that gives you peace of mind without breaking the bank.
And it’s not just about security; it’s also about durability. Families with kids or pets often slam doors, and a reinforced strike plate prevents wear and tear that can loosen the lock over time.
Here’s a quick mental checklist: check the existing plate for gaps, measure the screw length, grab a heavy‑duty plate, and drive the screws into the studs. If you’re not comfortable drilling into the frame, a professional can finish the job in under an hour.
Now you might wonder, does this upgrade interfere with the door’s operation? Not at all—once installed, the deadbolt still slides smoothly, but you gain an extra barrier that forces an intruder to use more force, buying you crucial seconds to call for help.
Ready to make that simple change? In the next sections we’ll walk through the exact tools you need, step‑by‑step installation tips, and how to test your work for maximum protection.
If you want a quick, budget‑friendly boost to your home’s first line of defense, deadbolt strike plate reinforcement is the go‑to upgrade that stops burglars in their tracks.
Just replace the thin plate, use three‑inch screws into the studs, and you’ll gain extra resistance without sacrificing the deadbolt’s smooth operation.
Step 1: Assess Your Existing Strike Plate
First thing’s first – take a good look at the metal piece that greets your deadbolt every time you turn the key. Does it feel flimsy? Is there a noticeable gap between the plate and the jamb when the bolt slides home? If you’ve ever felt that faint wobble, you’ve already spotted the weak spot that burglars love to exploit.
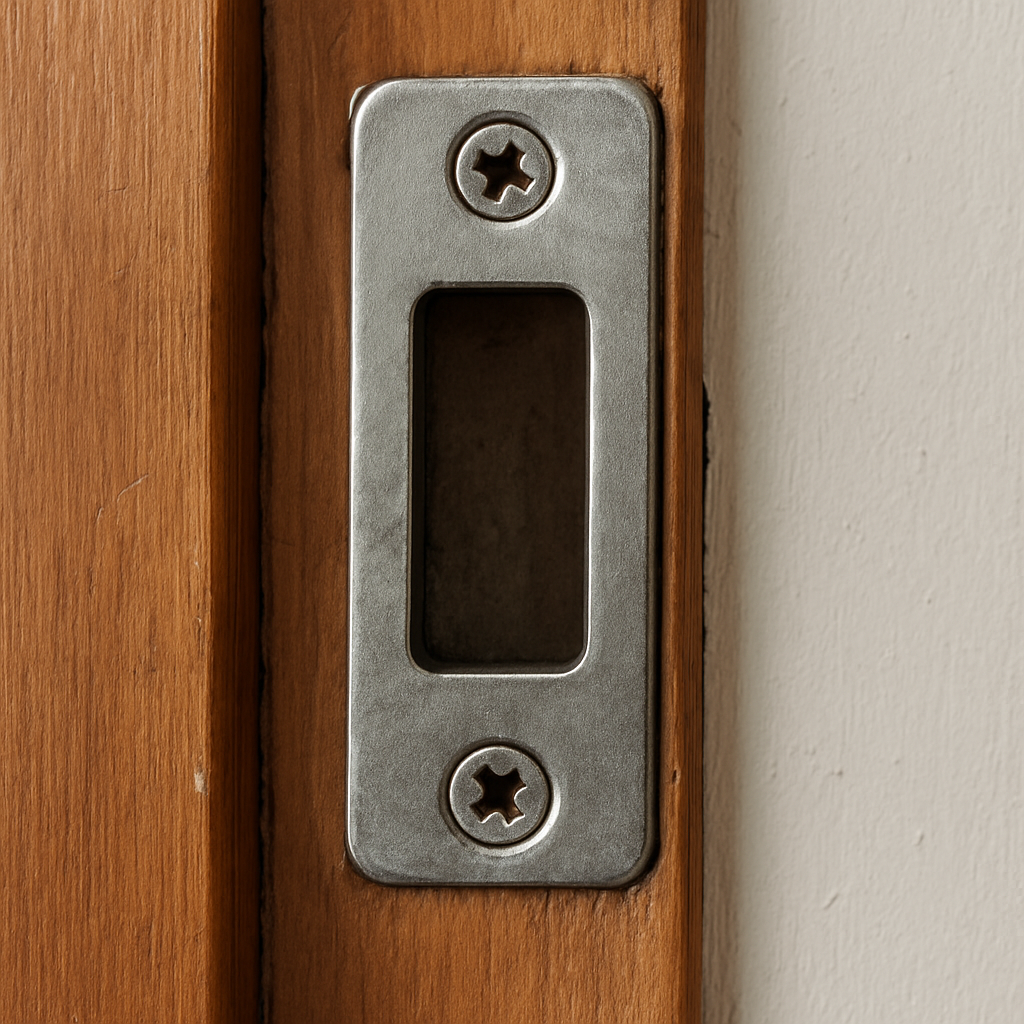
Grab a flashlight and shine it straight onto the plate. You’re looking for two tell‑tale signs: a thin, almost paper‑thin plate that bends under light pressure, and screws that are only an inch long, barely sinking into the veneer of the frame. In our experience, most stock plates are about 1 mm thick and mounted with short #8 screws that never reach the studs.
Measure before you replace
Pull the plate away gently – you don’t want to strip the screws. Use a ruler or a tape measure to note the width of the plate (usually 3‑4 inches) and the depth of the screw holes. Write those numbers down; they’ll guide you when you shop for a heavy‑duty replacement.
While you’re at it, check the door jamb itself. Is the wood solid or does it feel soft, like it’s been sanded down over the years? A sturdy jamb is essential because the longer 3‑inch screws need to bite into solid wood, not just a hollow core.
Need a quick refresher on how door hardware fits into the bigger picture of home safety? Our Ultimate Guide to Home Safety breaks down why reinforcing the strike plate is a cornerstone of a layered security strategy.
Quick visual checklist
- Plate thickness: less than 1 mm? Time to upgrade.
- Screw length: 1 in or shorter? You’ll want 3‑inch screws.
- Gap size: any space between plate and jamb when the bolt is locked? Aim for a flush fit.
Does this sound like a lot? Think of it like a health check for your door. Just as you’d glance at tire tread before a road trip, a quick plate audit can save you a costly break‑in later.
Now, let’s talk tools. A basic screwdriver set, a tape measure, and a flashlight are all you need for the assessment. If you discover the plate is too thin, you’ll also need a drill, a set of 3‑inch lag screws, and a replacement strike plate – preferably a 2 mm heavy‑duty model.
After watching the video, pause and compare what you see on screen with your own door. Spot any differences? Those are the clues that will tell you whether you need a larger plate or just longer screws.
When you’re ready to buy, consider browsing hardware sections at Nina Bazaar. They carry a range of reinforced strike plates, extra‑long screws, and even installation kits that make the swap painless.
And if you’re a homeowner who’s recently taken out a mortgage, you might wonder how this improvement fits into your budgeting plan. A modest upgrade like this rarely costs more than $30‑$50, a tiny line item compared to the peace of mind it adds. For more financial guidance, check out Pacshores Mortgage – they often publish tips on home‑improvement budgeting.
Finally, once you’ve inspected and measured, write down your findings. A short note like “Replace 1 mm plate, install 3‑inch screws into studs” keeps you focused and makes the next step—actually installing the new plate—a breeze.
Step 2: Choose the Right Reinforcement Materials
Now that you’ve taken a good look at what you’ve got, it’s time to pick the pieces that will actually stop a pry bar in its tracks. Think of it like choosing the right armor for a knight – the material, thickness, and how it’s attached all matter.
What material makes a plate “reinforced”?
Most cheap plates are stamped 0.7 mm sheet steel – barely thicker than a soda can. A true reinforcement plate jumps to at least 2 mm, often hardened steel or a zinc‑coated alloy that resists denting. You’ll feel the difference when you lift it; it’s noticeably heavier and less likely to bend under pressure.
Some manufacturers also add a rubber or silicone backing. That extra layer spreads the force across a larger area of the jamb, kind of like a cushion for your door’s frame. It’s especially helpful on older, softer wood that might split under a direct hit.
Screw length – the hidden hero
Even the toughest plate won’t help if the screws only bite the veneer. Aim for 3‑inch (7.5 cm) wood screws that reach the studs behind the jamb. The longer the thread, the more surface area it has to grip – think of it like a climber with longer fingers finding better holds.
When you’re shopping, look for screws labeled “grade‑8” or “high‑strength.” Those are heat‑treated to keep their threads from stripping out when you torque them in.
Choosing the right plate for your door
If your door frame is solid hardwood, a plain 2 mm steel plate with dual tabs will do the trick. But if you’ve got a hollow‑core or a door with a thin pine jamb, you’ll want a plate that includes a metal backer or a “reinforcement kit” that slides behind the existing plate.
Another factor is the bolt clearance. A plate with a larger “strike face” – the part the deadbolt hits – reduces the chance of the bolt slipping past the edge. Look for a face that’s at least 1.5 inches wide; that extra width buys you a few more millimeters of metal to absorb the force.
Watch the short video above if you’re visual‑oriented – it walks through how the plate and screw combo actually engages the door frame. Pause it at the 1:20 mark to see the difference between a 1‑inch screw and a 3‑inch screw in real time.
Budget‑friendly picks without sacrificing security
You don’t need to break the bank to get a solid upgrade. A basic 2 mm steel plate and a pack of 3‑inch grade‑8 screws can be found for under $30 at most hardware stores. If you’re hunting online, filter for “heavy‑duty strike plate” and read the specs – the thickness and screw length are usually listed in the product description.
For renters or folks who can’t drill into studs, a surface‑mount reinforcement kit is a good compromise. It adds a metal “sleeve” behind the existing plate, spreading impact forces even though it doesn’t reach the studs. It won’t be as strong as a full‑stud install, but it still adds a couple of seconds of resistance – and that’s often enough to deter a casual intruder.
Finally, don’t forget to double‑check that the plate’s finish matches your door hardware. A brushed nickel plate looks nicer on a modern entry, while a black‑oxide finish blends better with older, rustic doors. Aesthetic consistency might seem trivial, but it makes the whole upgrade feel intentional rather than a DIY after‑thought.
Take a moment, write down the material, thickness, and screw length you’ve decided on, then head to your local hardware aisle or favorite online retailer. With the right reinforcement materials in hand, the next step – actually installing them – will feel a lot less like guesswork and a lot more like a confident upgrade.
Step 3: Install the Reinforcement Plate
Gather Your Tools
First thing’s first – pull out a Phillips‑head screwdriver, a 1/8‑inch drill bit, a stud‑finder, a pencil, and the two 3‑inch grade‑8 screws that came with your plate.
Do you have a drill with adjustable clutch? If so, set it low; you don’t want to snap the wood while you’re trying to tighten things up.
Mark the Studs
Run the stud‑finder along the jamb where the plate will sit and make a quick pencil mark where the studs intersect the strike‑face.
Seeing those marks will save you a lot of guesswork later – no one wants to drill into a hollow spot and watch the plate wobble.
Position the Plate
Place the reinforcement plate flush against the jamb, aligning the holes with the stud marks you just made.
Press it lightly and notice the “feel” – a good fit will sit flat, no gaps, no rocking.
If the plate has a low‑profile design, you might need to tap it gently with a rubber mallet so the tabs bite into the wood.
Pre‑Drill Pilot Holes
Using the drill bit that matches your screw’s core (usually 1/8 inch), drill pilot holes through the plate’s mounting tabs into the stud.
Take a breath and go slow; a clean pilot hole means the screw will thread in without stripping.
Tip: pull the drill out while the bit is still rotating to avoid splintering the wood.
Secure the Screws
Now drive the long screws all the way in, making sure the heads sit just beneath the plate’s surface.
If you feel resistance before the screw is fully seated, back it out a turn and try again – you don’t want the screw to bite the wood at an odd angle.
When both screws are tight, give the plate a firm wiggle; it should feel immovable.
Check Alignment
Close the door and engage the deadbolt. Does the bolt sit flush against the reinforced face?
If there’s any gap, loosen the screws just enough to shift the plate a hair’s breadth, then retighten.
That tiny adjustment can mean the difference between a bolt that slides smoothly and one that catches.
Test the Upgrade
Grab a sturdy screwdriver or a small pry bar and give the lock a gentle lever. You should feel noticeably more resistance compared to the original setup.
Remember, the goal isn’t to make the door impossible to open – it’s to buy you a few extra seconds if someone tries to kick or pry it.
For a quick visual cue, check the finish match; a brushed‑nickel plate should blend with the existing hardware, keeping the look tidy.
Final Touches
Wipe away any pencil marks with a damp cloth, and store the extra screws in a small zip‑lock bag for future touch‑ups.
Finally, jot down the plate’s brand and screw length in your home‑maintenance notebook – you’ll thank yourself when it’s time for a seasonal check.
And that’s it – you’ve just completed the deadbolt strike plate reinforcement. A simple, weekend‑sized project that adds a solid layer of protection without a professional call‑out.
Looking for a reliable plate? The Tuff Strike Two Post Strike Plate is a popular choice that ticks all the boxes: heavy‑duty steel, multiple finishes, and an easy‑install template.
Step 4: Secure Screws and Fasteners
Now that the plate is sitting flush, the real work begins: making sure every screw bites the stud and stays tight for years to come. This is the part that turns a neat-looking upgrade into a genuine security boost.
Pick the right screws
We’ve already mentioned 3‑inch grade‑8 wood screws, but let’s break down why they’re the sweet spot. Grade‑8 means the steel has been heat‑treated, so the threads won’t strip when you torque them down. Three inches is long enough to pierce the jamb’s veneer and hit the solid framing behind it – that’s where the strength lives.
If you’re working with a metal‑clad door frame, a stainless‑steel screw will resist rust better than a plain zinc‑coated one. And don’t forget the head style: a flat‑head sits flush under the plate, keeping the surface smooth and preventing snagging on a door‑stop.
So, what should you grab from the hardware store? A small pack of #8‑10 mm diameter, 3‑inch, flat‑head, grade‑8 screws – they’re cheap, and you’ll have a few spares for future touch‑ups.
Prep the hole
Before you slam the screwdriver, drill a pilot hole. Use a 1/8‑inch (3 mm) drill bit that matches the screw’s core. The pilot does two things: it guides the screw straight into the stud and it prevents the wood from splitting.
Place the drill tip on the center of the plate’s mounting tab, keep the bit perpendicular, and go slow. You’ll feel a slight resistance when the bit hits the stud – that’s the sweet spot. Pull the bit out while it’s still spinning; the wood fibers stay intact and the hole stays clean.
Drive the screws properly
Grab your drill or screwdriver with an adjustable clutch. Set the clutch low – you want the screw to bite, not strip the wood. Start the screw slowly until you feel the head catch the plate, then increase speed.
If the screw resists before it’s fully seated, back it out a turn, check the alignment, and try again. A crooked screw will pull the plate away from the jamb, creating a gap that a burglar could exploit.
When the head is just shy of the plate surface, give it a final turn with just enough torque to flatten the head. You should hear a faint “click” as the threads settle into the stud – that’s the sound of security locking in.
Double‑check tightness
After both screws are in, give the plate a firm wiggle. Nothing should move. Then close the door and engage the deadbolt. The bolt should meet the reinforced face squarely, with no visible gap.
If you notice any play, loosen the screws just enough to shift the plate a hair’s breadth, then retighten. That tiny adjustment can be the difference between a smooth bolt and a stubborn catch.
Tips for special situations
Older homes often have plaster or thin veneer around the jamb. In those cases, pre‑drill a ½‑inch deeper pilot so the screw still reaches the stud behind the finish material. For metal‑clad frames, use a self‑tapping screw or first drill a clearance hole for the screw shank, then a second, slightly larger hole for the threads.
Got a door that swings both ways (French doors, double‑entry doors)? Install a screw on each side of the plate’s tab to distribute the load evenly. It adds a bit more work, but the added stability is worth it.
Final quick check
Before you call it a day, wipe away any pencil marks, stash the extra screws in a zip‑lock bag, and jot down the screw length and plate model in your home‑maintenance notebook. A quick note now saves a trip to the hardware aisle later.
And there you have it – the screws are tight, the plate is solid, and your deadbolt strike plate reinforcement is ready to give intruders a serious pause. A weekend project, a few tools, and a little patience, and you’ve added a layer of protection that’ll pay off in peace of mind.
Step 5: Test, Adjust, and Compare Options
Okay, you’ve got the plate on the door and the screws biting into the studs. Now comes the part that feels a bit like a science experiment – you need to see if everything actually holds up under real‑world pressure. Don’t worry, it’s not rocket science; it’s just a few quick checks that give you confidence your deadbolt strike plate reinforcement is doing its job.
Check the fit and feel
Close the door and pull the deadbolt back. Do you hear a solid “click” and feel the bolt slam flat against the plate? If there’s any wiggle, that’s a red flag. Grab a sturdy screwdriver or a small pry bar and give the bolt a gentle lever. You should feel noticeably more resistance than you did before the upgrade. If the plate flexes or the screws pop out, you’ve got work to do.
Another simple test is the “hand‑push” method. Put your palm on the door frame near the plate and push hard as if you were trying to kick the door in. The plate should stay glued to the jamb, and the door should still swing smoothly. If the frame flexes, consider a longer screw or a deeper pilot hole.
Adjust screw depth
Sometimes the screw heads sit just a hair too high, leaving a tiny gap between the plate and the jamb. That gap can become a lever point for a determined intruder. Loosen each screw a quarter turn, tap the plate gently with a rubber mallet to settle it, then retighten until the head is just below the plate surface. You’re looking for a flush, “no‑gap” feel.
If you notice the wood starting to split, back off a bit. That’s why pre‑drilling a pilot hole that’s slightly deeper than the screw length is key – it gives the wood room to breathe while the screw still gets a solid bite.
Compare options side‑by‑side
Not every door is the same, and sometimes the first set of screws isn’t the best fit. Below is a quick table that lays out three common approaches you might consider after the initial test.
| Option | Pros | Cons | When to use |
|---|---|---|---|
| Standard 3‑inch grade‑8 screws | Easy to find, reliable hold in most wood studs | May not reach deep enough in thick jambs | Typical single‑stud residential doors |
| Longer 4‑inch screws | Extra bite into deeper framing, extra torque resistance | Harder to drive, risk of hitting wiring | Older homes with thick plaster or double‑stud frames |
| Adjustable plate with spring‑loaded screws | Self‑tightening, compensates for wood movement | Higher cost, may need specialty tools | Doors in high‑traffic areas or homes with pets that slam doors |
Take a moment after the table to look at your own door. Does the standard option feel solid enough, or do you hear that faint “give” that suggests you need a longer screw? If you’ve got a busy family with kids who love to pound the door, the adjustable plate might be worth the extra investment.
One last tip: write down the exact screw length and plate model you end up using. A quick note in your home‑maintenance notebook saves you from guessing next time you need a replacement or want to upgrade another door.
And that’s it – a handful of simple tests, a few tweaks, and you’ve got a deadbolt strike plate reinforcement that actually works. You’ve turned a weak spot into a sturdy barrier, and you can walk through your front door with a little more peace of mind.
Step 6: Add Extra Security Enhancements
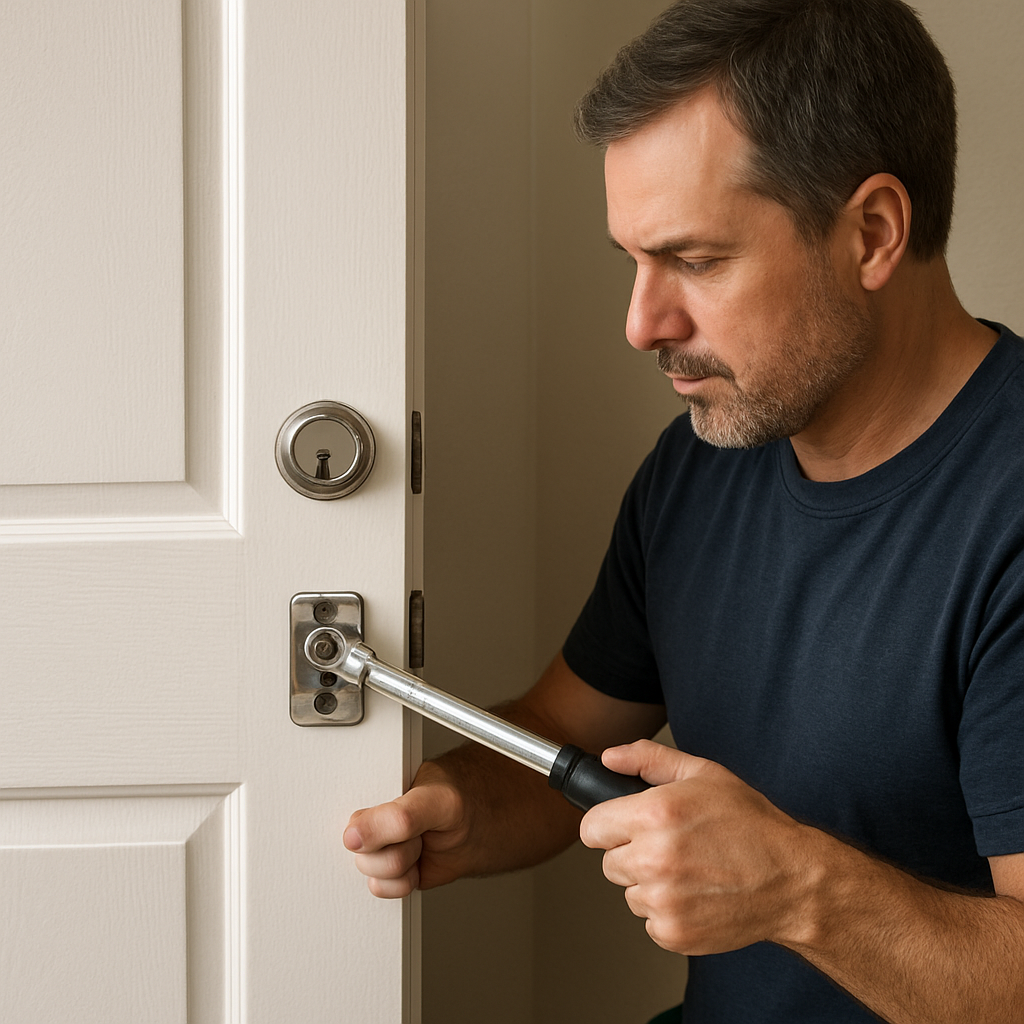
Now that your deadbolt strike plate reinforcement is in place, you might be wondering what else you can do to turn that ordinary door into a mini‑fortress.
And the good news is—you don’t need a security consultant or a budget‑busting renovation. A handful of inexpensive tweaks can add layers of protection that force a would‑be intruder to think twice.
1. Install a door‑jamb reinforcement bar
Picture a metal brace that sits between the frame and the hinge side of the door. When someone tries to kick the door, the bar distributes the force across a larger area, keeping the jamb from splitting.
Grab a 1‑inch steel angle bar, a couple of 3‑inch lag bolts, and a drill. Screw the bar into the studs on either side of the jamb, making sure it’s flush with the surface. A quick tighten and you’ve added a “cheat code” for burglars.
Does it sound messy? Not really—most DIYers finish this in under an hour, and the visual impact is minimal.
2. Add a surface‑mounted security film
Even the toughest lock can’t help if the glass beside your door shatters easily. A clear, shatter‑resistant film holds the pane together long enough for you to get out or call for help.
Just cut the film to size, spray the adhesive, and smooth it on. It’s a 5‑minute job, and you’ll notice the difference if you ever accidentally kick the door.
3. Use a door‑sweep and weather‑strip combo
Think of the sweep as a silent guardian that blocks the gap at the bottom of the door. It prevents a pry bar from slipping under the lock and also keeps drafts out.
Install the rubber sweep on the interior side and a metal brush seal on the exterior. Adjust it until it brushes the floor lightly—no scraping, just a soft seal.
4. Reinforce the hinges
Most people overlook hinges, but they’re a common attack point. Swap any 3‑inch screws that only go into the jamb’s veneer for 3‑inch screws that reach the studs.
If your door has only two hinges, add a third one about a foot down from the bottom. The extra pin gives the door an extra “anchor” that resists lever attacks.
5. Upgrade to a smart deadbolt (optional)
If you already love the idea of remote access, a smart deadbolt can add another layer of deterrent. Look for models that still use a traditional deadbolt core—so you retain mechanical security if the battery dies.
Many of these units also log entry attempts and can send you a push notification the instant someone tries the door. It’s not a substitute for the physical reinforcement you just installed, but it’s a handy complement.
6. Light the entryway
Burglars hate light. Install a motion‑sensor floodlight that kicks on the moment someone approaches. Even a simple LED strip under the porch step can make a big psychological difference.
Pair the light with a visible “security camera” sign (even a dummy one) to reinforce the perception that you’re watching.
7. Keep a maintenance checklist
All these upgrades work best when they’re in good shape. Write down a quick quarterly checklist: tighten hinge screws, inspect the reinforcement bar for rust, verify the security film isn’t peeling, and test the motion light’s sensor range.
When you revisit the list, you’ll catch wear before it becomes a weakness.
So, what’s the next step? Grab a drill, a couple of screws, and start adding those layers. Each one is a small investment that multiplies the time an intruder needs to get past your front door—and that extra time could be the difference between a break‑in and a cold night.
In the end, deadbolt strike plate reinforcement is just the first brick. Stack the rest, and you’ll have a door that feels as solid as the safe you keep your valuables in.
FAQ
What is deadbolt strike plate reinforcement and why does it matter?
In plain terms, it’s a stronger metal plate that sits behind your deadbolt’s bolt and a set of longer, high‑grade screws that pull the plate into the wall studs. The extra mass and deeper bite make it much harder for a burglar to pry the bolt loose or kick the jamb out of shape. Think of it as adding a steel shield to the weakest point of your front door – the spot that gets the most force when someone tries to break in.
How can I tell if my current strike plate needs reinforcement?
First, close the door and look at the gap between the bolt and the plate. If you can see a dark line of wood behind the plate, the bolt is hitting the jamb, not the metal – that’s a red flag. Next, pull the plate off and check the screw length; standard 1‑inch screws only bite the veneer. Finally, give the plate a firm wiggle – any movement means the plate isn’t anchored solidly enough.
What thickness and material should I look for in a reinforced strike plate?
Cheap plates are usually 0.7 mm stamped steel – barely thicker than a soda can. A real reinforcement plate should be at least 2 mm thick and made from hardened steel or a zinc‑coated alloy that resists denting. Some premium options add a rubber or silicone backing to spread the force across a larger area of the jamb. The extra weight you feel when you lift the plate is a good indicator that you’ve got the right material.
Do I really need 3‑inch screws, and can I use shorter ones?
Yes, the 3‑inch (about 7.5 cm) grade‑8 wood screws are the hidden hero. They reach past the thin veneer and grab the solid studs behind the door frame, which is where the real strength lives. Shorter screws may hold the plate in place, but they’ll strip out under pressure, giving a burglar an easy lever point. If you have an older home with a double‑stud wall, you might even consider 4‑inch screws for that extra bite.
Can I reinforce a strike plate on a rented home without damaging the door frame?
Absolutely. Look for surface‑mount reinforcement kits that add a metal “sleeve” behind the existing plate. They don’t reach the studs, but they spread the impact force and still buy you a few crucial seconds. When you’re done, the kit can be unscrewed and the original plate re‑installed, leaving the jamb as you found it. Just be sure to use the provided screws and follow the kit’s pilot‑hole recommendations to avoid splitting the wood.
How often should I inspect my reinforced strike plate?
Make it part of your quarterly home‑maintenance checklist. Give the plate a quick wiggle, verify the screw heads sit just below the surface, and glance for rust or paint chipping. If you’ve had a storm, a heavy door slam, or a pet that likes to jump on the door, check it a month after the event. Spot‑checking every three months keeps the reinforcement solid and gives you peace of mind year‑round.
Conclusion
We’ve walked through why a solid deadbolt strike plate reinforcement is one of the smartest DIY upgrades you can make. From spotting a flimsy 0.7 mm plate to swapping in a 2 mm hardened steel version with 3‑inch grade‑8 screws, the steps are simple but the payoff is big.
Think about the peace of mind you get every time you lock the door – no more worrying that a pry bar could snap the jamb in seconds. A quick quarterly check, a few minutes of tightening, and you’ve added a layer of protection that most burglars won’t bother with.
So, what’s the next move? Grab your stud finder, measure the screw length, and install that reinforced plate before the next season of storms or holiday visitors. If you’re renting, remember the surface‑mount kits that leave no trace when you move out.
At Home security Ready we’ve seen countless homeowners sleep easier after this upgrade. Keep a note of the product specs in your maintenance journal – it saves a trip to the hardware aisle later.
Ready to take the final step? Pull out that old plate, follow the checklist we’ve laid out, and give your front door the extra seconds it deserves. Your home’s security starts with that one small, confident action.