
Ever been woken up at 2 a.m. by that high‑pitched chirp from your smoke detector, and wonder if the device is trying to tell you something more than just a low battery?
You’re not alone – we’ve all stared at that blinking LED, feeling half‑asleep and half‑frustrated, wondering whether it’s a genuine fire risk or just a nuisance.
The good news is, most chirps have simple fixes, and you don’t need to call an electrician or replace the whole unit right away.
In this guide we’ll walk through exactly how to stop smoke detector from chirping, step by step, so you can get a quiet night’s sleep without compromising safety.
First, check the battery. Even the newest hard‑wired detectors have a backup cell, and a weak battery will emit that tell‑tale beep. Twist the detector off its base, pull out the battery, and replace it with a fresh 9‑volt – you’ll hear an audible chirp confirming it’s working.
If the battery’s fine, look for dust or insects. A tiny spider web can bridge the sensor’s contacts, causing intermittent chirps. Use a soft brush or a vacuum on low suction to clear the housing – just be gentle so you don’t damage the sensing chamber.
Sometimes the chirp is a warning that the detector is reaching the end of its life – most models need replacement every 8‑10 years. Check the manufacture date on the back; if it’s older than a decade, it’s time for a new unit.
Lastly, make sure the detector is mounted in the right spot. Placing it too close to a kitchen exhaust fan or a bathroom vent can cause false alarms when steam or cooking fumes drift by.
Now that you know the common culprits, you’ve got a clear plan to silence that irritating chirp without sacrificing protection. Ready to tackle it?
Give it a try tonight, and you’ll thank yourself in the morning.
TL;DR
If your smoke detector’s chirp is keeping you up, start by checking the battery, cleaning dust or webs, and confirming the unit isn’t past its 8‑10‑year lifespan.
Follow these quick steps and you’ll silence the beep while staying safe, so you can sleep soundly without worrying about a false alarm.
Table of Contents
- Step 1: Identify the Type of Chirp and Its Cause
- Step 2: Replace or Recharge the Battery Correctly
- Step 3: Clean the Detector and Reset It
- Step 4: Check for Environmental Factors and Interference
- Step 5: Compare Different Smoke Detector Models and Features
- Conclusion
- FAQ
Step 1: Identify the Type of Chirp and Its Cause
Ever lay awake, half‑asleep, and wonder if that beeping is a warning or just a tired battery? The first thing we do at Home security Ready is pause, listen, and figure out what kind of chirp you’re hearing.
There are three basic families of chirps you’ll run into: a low‑pitched single beep that repeats every minute, a rapid series of three or four beeps, and an intermittent, irregular click‑click. Each pattern points to a different culprit.
Single‑beep every minute? That’s usually the low‑battery alert. Even hard‑wired units have a backup cell, and when that cell dips below 2.5 V the detector lets you know it needs a fresh 9‑volt.
Three‑beep pattern? That often means a sensor fault – dust, insects, or humidity in the sensing chamber. It’s the device’s way of saying, “I’m not sure what’s happening, but I’m on guard.”
Irregular clicks? Those are usually a warning that the unit is reaching the end of its service life. Most models are rated for 8‑10 years; after that the internal circuitry can misbehave.
So, how do you quickly tell which one you’re dealing with? Grab a flashlight, pop the unit off its base, and take a quick look at the LED indicator. Most detectors flash a steady green for battery‑good, a rapid amber for sensor issues, and a slow amber or red for end‑of‑life.
Once you’ve identified the pattern, you can move on to the right fix. But before you get into the nuts and bolts, here’s a quick visual walk‑through that shows exactly how we check each symptom.https://www.youtube.com/embed/WqWraWeXSUE
Notice in the video how the presenter first watches the LED, then gently rotates the detector to expose the battery compartment. That little routine saves a lot of guesswork.
Now, let’s break down the three scenarios with a short checklist you can print out and keep in your toolbox.
Battery‑Low Chirp Checklist
- Listen for a single, steady beep every 30‑60 seconds.
- Look for a solid green LED.
- Open the detector, remove the backup 9‑volt battery, and replace it with a fresh one.
- Press the test button; you should hear a short “beep‑beep” confirming the new battery.
If the chirp stops, you’ve solved it. If it persists, move on to the sensor‑fault steps.
Sensor‑Fault Chirp Checklist
- Identify a pattern of three short beeps.
- Check for a flashing amber LED.
- Use a soft brush or a can of compressed air to clear dust from the sensor’s opening.
- Inspect for spider webs or insects; gently remove them with a wooden stick.
- Run the self‑test; the detector should emit a single confirmation beep.
Often, a quick dust‑off does the trick. If the beeping continues, the unit might be moisture‑damaged – try moving it away from bathroom exhausts or kitchen vents.
End‑of‑Life Chirp Checklist
- Irregular clicks or a slow amber/red LED.
- Locate the manufacture date on the back; if it’s older than ten years, it’s time for a replacement.
- Dispose of the old unit according to local regulations (many hardware stores accept them).
- Install a new detector, ideally a model with a sealed sensor that’s less prone to false alarms.
Replacing the whole unit may feel like a hassle, but it guarantees you won’t miss a real fire alarm later on.
Remember, the key to stopping that annoying chirp is matching the sound pattern to its cause, then taking the precise action. It’s a little detective work, but once you know the code, you’ll never be blindsided again.
Step 2: Replace or Recharge the Battery Correctly
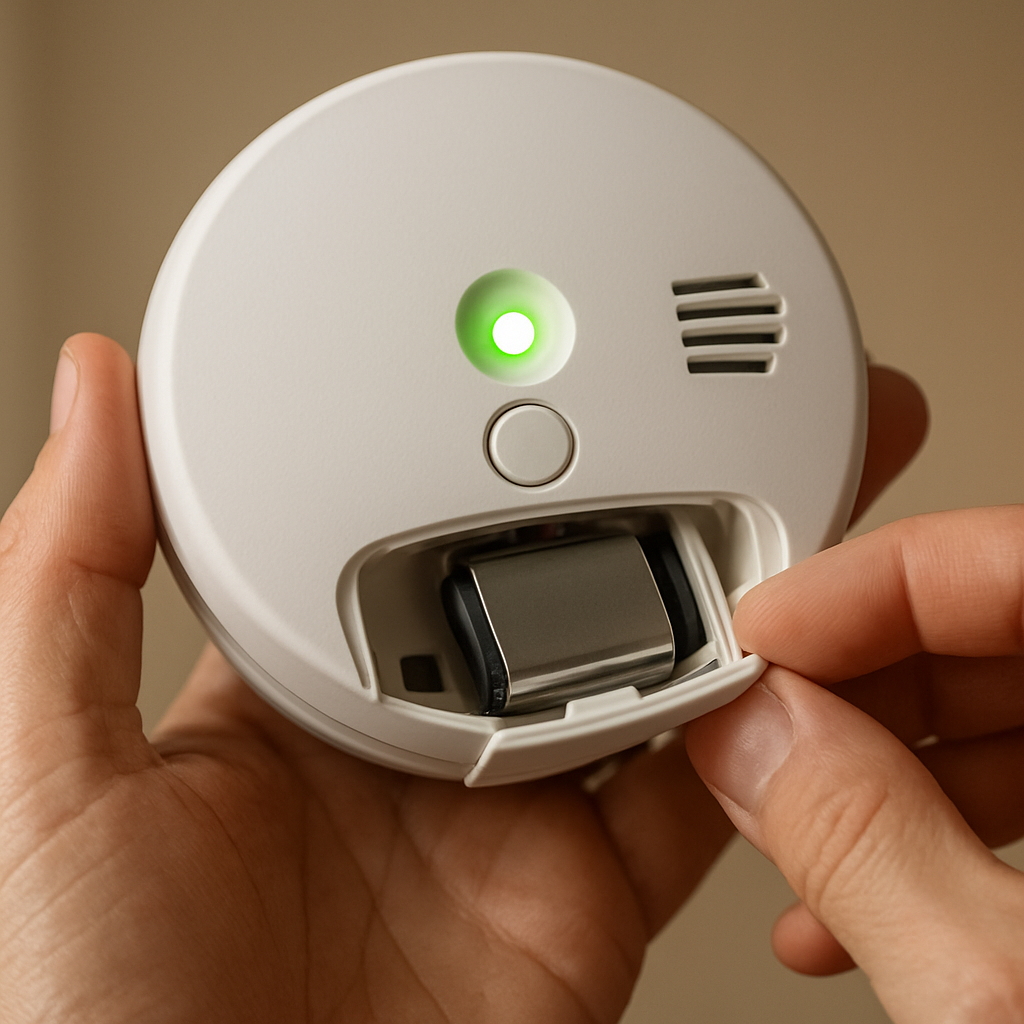
Alright, you’ve heard that single chirp and you know it’s probably the backup battery. The trick isn’t just tossing a fresh 9‑volt in there and walking away – the way you install it can mean the difference between a silent night and a relentless beep.
Why the “how” matters
Even a brand‑new battery can act up if the contacts are corroded or if the detector’s internal capacitor still holds a charge from the old cell. In our experience at Home Security Ready, we’ve seen homeowners swap batteries without clearing the residual voltage, only to hear the same chirp a few minutes later.
Step‑by‑step battery swap
1. Turn off power (hard‑wired units only). Flip the circuit breaker for the detector’s circuit and wait a full 60 seconds. This guarantees the unit fully powers down.
2. Open the detector. Most models have a twist‑off cover or a small latch. Gently pry it open – you don’t need a screwdriver.
3. Inspect the contacts. Look for any white crust or greenish buildup. If you see it, dip a cotton swab in a tiny bit of isopropyl alcohol and clean the contacts. Let them dry completely.
4. Insert the new battery the right way. Polarity matters – the + and – symbols are usually printed on the detector’s battery compartment.
5. Reset the unit. Press and hold the test button for 10‑15 seconds. This discharges any lingering charge and forces the detector to reboot with the fresh cell.
Rechargeable options
Some newer models, especially those marketed as “smart” smoke alarms, use rechargeable lithium packs. If you have one of these, you’ll notice a small charging port (often micro‑USB or USB‑C). Plug it into a wall adapter for the recommended 2‑hour charge cycle. Don’t skip the “reset” step after charging – press the test button for a solid 5 seconds to confirm the alarm’s ready.
Real‑world examples
Take Jane, a first‑time homeowner in Melbourne. She replaced the battery in a hard‑wired Kidde alarm, but the chirp kept coming. The culprit? A tiny piece of dust that settled on the battery spring, preventing solid contact. A quick brush with a soft paintbrush solved it.
Then there’s Mark, who lives in a high‑rise condo in Dubai. His detector uses a rechargeable pack that he’d forgotten to charge after a power outage. Once he plugged it in and let it sit for the full charge, the alarm fell silent. He also learned that the unit’s built‑in self‑test can be triggered by pressing the button twice – a handy way to double‑check after a recharge.
Tips from the pros
• Don’t over‑tighten the cover. Screwing it down too hard can bend the contacts.
• Use a quality battery. Cheap “off‑brand” 9‑volt cells often have lower voltage and can cause premature chirps.
• Mark the replacement date. Write the month and year on a sticky note and tape it inside the detector’s housing – you’ll thank yourself when the next replacement rolls around.
When to move on to a full replacement
If, after a clean install and reset, the chirp persists for more than a few minutes, it’s time to consider swapping the whole unit. Most smoke detectors have a lifespan of 8‑10 years; beyond that the sensor can degrade, leading to false alarms. A quick visual check of the manufacture date (usually stamped on the back) will tell you if you’re dealing with an aging device.
In short, a proper battery swap is about more than just the fresh cell – it’s a mini‑maintenance routine that clears old charge, checks contacts, and gives the detector a clean slate. Follow these steps, and you’ll keep the chirp at bay while maintaining a reliable line of defense for your home.
Step 3: Clean the Detector and Reset It
So you’ve swapped the battery, but the chirp is still echoing down the hallway? That’s the moment many of us wonder if the detector is just being stubborn or if something else is lurking inside. The good news? A good cleaning and a quick reset often do the trick.
Why cleaning matters
Dust, spider webs, and even a tiny crumb can bridge the sensor’s contacts, sending mixed signals to the alarm’s circuit. In our experience at Home Security Ready, we’ve seen homeowners spend a fortune on new units when a simple brush‑off would have saved them both money and sleep.
Think about that moment when you hear a faint buzz after a rainstorm – the moisture on the sensor does the same thing. Removing that layer restores the detector’s ability to read smoke correctly and stops the false chirp.
Gather your tools
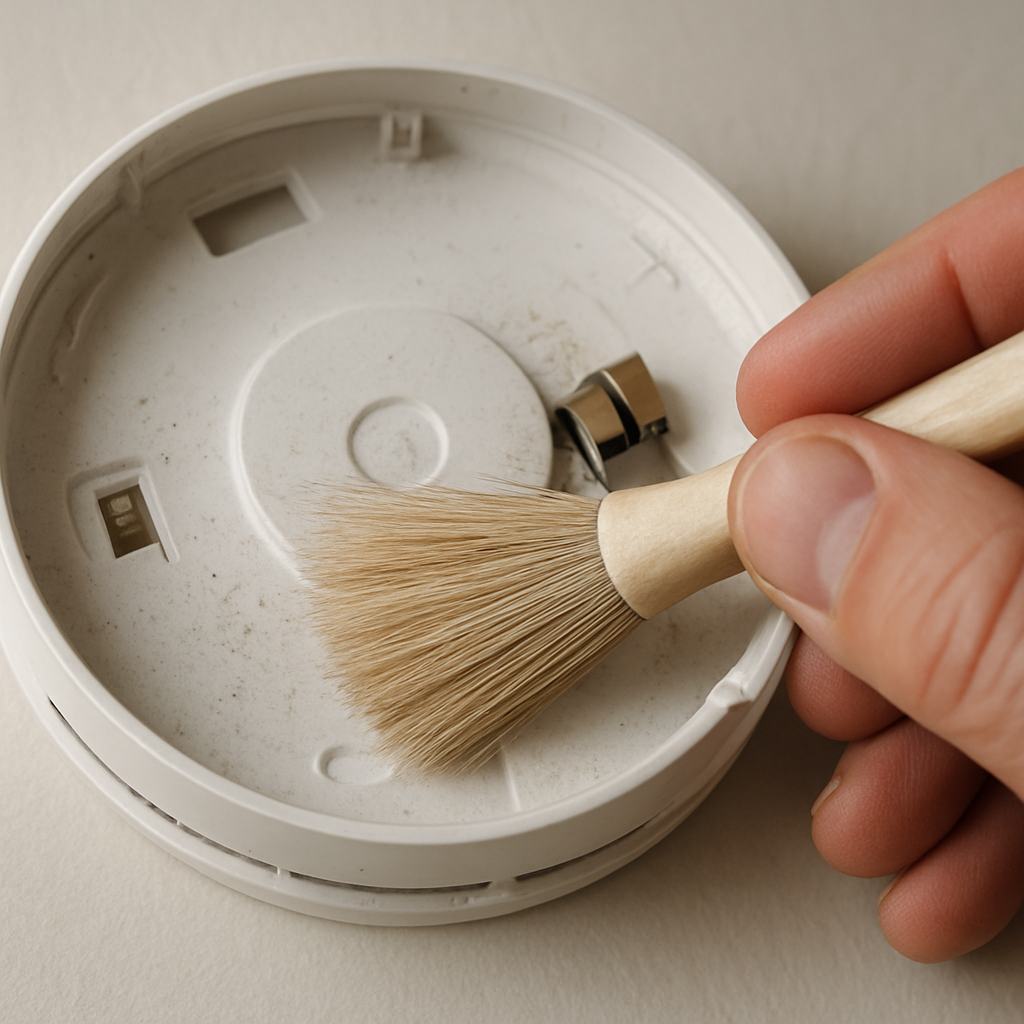
Before you dive in, grab a soft paintbrush, a can of compressed air (or a low‑suction vacuum), and a cotton swab dipped in a touch of isopropyl alcohol. No need for fancy equipment – the everyday items you already have are enough.
Got a screwdriver? You probably won’t need it, but keep it handy just in case your model has a screw‑down cover.
Step‑by‑step cleaning
1. Turn off power. If your detector is hard‑wired, flip the breaker for a full minute. This guarantees there’s no lingering voltage while you work.
2. Remove the detector. Twist or slide the unit off its mounting bracket. Most models pop right off; if yours feels stuck, a gentle wiggle usually does it.
3. Open the housing. Look for a small latch or a screw. Once open, you’ll see the sensor chamber – it’s usually a clear or frosted dome.
4. Brush away debris. Use the soft brush to sweep any dust or cobwebs from the sensor and the metal contacts. Follow the brush with a burst of compressed air to dislodge particles from hard‑to‑reach corners.
5. Clean the contacts. If you spot any white or greenish buildup on the battery terminals, dip a cotton swab in a dab of isopropyl alcohol and gently wipe them clean. Let them dry completely – a few seconds is enough.
6. Re‑assemble. Snap the cover back on, slide the detector onto its bracket, and make sure it sits snugly.
Need a visual reference? Check out this quick cleaning demo on YouTube for a step‑by‑step walk through.
Resetting the unit
Now that the dust is gone, you need to flush any residual charge that might be lingering in the detector’s capacitor. Press and hold the test button for about 15 seconds. You’ll hear a series of beeps – that’s the unit draining its internal power and rebooting with a fresh start.
After you release the button, wait a few seconds and then press it again for a quick test. If you hear a solid, single chirp, the alarm is confirming it’s alive and well. No more intermittent beeps means you’ve succeeded.
But what if the chirp still lingers? Double‑check the battery contacts one more time, and make sure the detector’s mounting location isn’t too close to a kitchen exhaust or bathroom fan – airflow can sometimes introduce moisture that mimics a fault.
In most cases, a thorough cleaning followed by a reset eliminates the nuisance. If the chirp persists after these steps, it’s likely time to consider a full replacement, especially if the unit is approaching the 8‑10‑year age limit.
Remember, regular maintenance – a quick dust‑off every six months – keeps your detector ready for the real thing and saves you from midnight wake‑up calls.
Step 4: Check for Environmental Factors and Interference
Okay, you’ve cleaned, you’ve reset, and the chirp still won’t quit. That’s the moment we start looking at what the room itself is doing to the detector.
Is the detector breathing too much?
Think about the kitchen exhaust fan humming while you’re whipping up breakfast. Those gusts of hot, moist air can sneak into a detector that’s mounted just a foot or two above the ceiling. The moisture mimics a fault, and the unit throws out that familiar chirp.
And the bathroom? A hot shower creates a steam cloud that can drift upward for minutes. If your alarm lives on the hallway wall right next to the bathroom vent, it’s basically sitting in a sauna every morning.
So, does your detector live too close to a source of steam or cooking fumes? If you’re not sure, step back a few inches and picture the airflow when you’re cooking or showering.
Check for hidden humidity
Grab a simple hygrometer (they’re cheap at any hardware store) and take a quick reading near the alarm. Anything above 60 % relative humidity is a red flag – the sensor’s internal electronics can start to think there’s a leak.
But you don’t need a fancy gadget. A quick test: run the fan on high for a minute, then listen for a chirp. If the beep kicks in as soon as the fan kicks on, you’ve found the culprit.
What to do? Move the detector at least six inches away from the vent, or install a small deflector plate (a piece of thin cardboard works fine) to keep direct airflow off the sensor.
Temperature swings can trick the alarm
Ever notice that the chirp gets louder right after the furnace kicks on in the winter, or when the A/C cycles in summer? Extreme temperature changes can cause the detector’s circuitry to expand and contract, creating tiny gaps that look like a fault.
Try to keep the unit away from direct drafts – think of the vent opening on the wall, the space above a heating vent, or a window that’s constantly being opened for fresh air.
If you can’t relocate the alarm, consider adding a small insulated bracket (plastic or rubber) to buffer the detector from the draft.
Electromagnetic interference – the silent gremlin
We tend to forget that our homes are full of Wi‑Fi routers, cordless phones, baby monitors, and even smart thermostats. Some of those devices emit low‑frequency electromagnetic fields that can confuse older smoke detectors, especially the cheap, non‑hardwired models.
Does your router sit right above the alarm? Does a baby monitor cradle sit on the same wall? Move those gadgets a foot or two away and see if the chirp quiets down.
And if you’ve got a whole‑home intercom or a metal security system panel nearby, give it a quick once‑over – sometimes the wiring itself can generate a faint hum that the alarm misinterprets.
Practical checklist – environmental audit
- Locate the detector and note its height relative to kitchen exhausts, bathroom vents, and HVAC registers.
- Run each fan (kitchen, bathroom, HVAC) on high for a minute while listening for a chirp.
- Measure humidity near the alarm; aim for below 60 % RH.
- Check for direct drafts from windows, doors, or heating/cooling vents.
- Ensure no Wi‑Fi routers, cordless phones, or other EM‑emitting devices are mounted directly above or beside the unit.
- If any of the above apply, reposition the detector or add a simple deflector/barrier.
And that’s it – a quick environmental audit can save you from endless late‑night beeping without swapping out the whole unit.
Remember, the goal isn’t to turn your home into a sterile lab; it’s to give your smoke detector a calm, stable environment so it can do what it does best: warn you when there’s real danger. A few inches of distance, a dash of ventilation, and a little awareness of where your gadgets live can make all the difference.
Give these steps a try tonight. If the chirp finally fades, you’ll have earned a quiet night’s sleep and the peace of mind that comes with a well‑placed, well‑maintained alarm.
Step 5: Compare Different Smoke Detector Models and Features
Now that you’ve ruled out batteries, dust, and drafts, the next logical question is: “Is the detector I have even the right one for my home?” That’s where a quick model‑by‑model comparison saves you from another midnight chirp.
We’ve seen three broad families pop up in most households: good‑old hard‑wired units, battery‑only alarms with a sealed ten‑year cell, and the newer smart, Wi‑Fi‑enabled models that talk to each other. Each has quirks that can either mute the beep or make it louder.
Hard‑wired with backup battery
These are the workhorses that stay powered even when the grid flickers. Because they draw electricity from your home’s circuit, a low‑battery chirp is rare—unless the backup cell is dead after years of neglect. The Family Handyman notes that a hard‑wired alarm with a ten‑year built‑in battery can last the life of the unit, cutting down on those annoying remindershardwired smoke detector guide.
If you’re forgetful about swapping batteries, this combo is a lifesaver. Just remember to reset the unit after a power outage (breaker off for a minute, then back on) to clear any residual charge that sometimes triggers a chirp.
Battery‑only with sealed 10‑year cell
Pure battery models are perfect for older homes or places where running new wiring is a pain. The sealed ten‑year lithium cell means you won’t see a chirp until the whole detector hits its decade‑old limit. The catch? If you live in a humid basement or near a kitchen vent, a weak battery can still misinterpret moisture as smoke, leading to intermittent beeps.
Tip: Mount these units at least three feet from exhaust fans and keep an eye on humidity levels—anything above 60 % RH is a red flag.
Smart Wi‑Fi or interlinked alarms
These gadgets promise “everything talks to everything,” and they do—especially when you have multiple alarms on the same network. The upside is you can get a phone alert before the chirp even sounds, but the downside is extra electronic chatter. Some cheap smart models have been known to misfire when a router sits right on top of the unit.
Our experience shows that moving the router a foot away or using a low‑profile mount usually quiets the false chirps. If you’re already invested in a home‑automation ecosystem, the convenience might outweigh the occasional hiccup.
Quick decision matrix
| Model Type | Power Source | Key Feature | Typical Price |
|---|---|---|---|
| Hard‑wired with 10‑yr backup | Line voltage + sealed battery | Never‑ends‑until‑10‑yr replacement; minimal chirps | $30‑$45 |
| Battery‑only sealed 10‑yr | Single 10‑yr lithium cell | Easy install; replace only whole unit after decade | $20‑$35 |
| Smart Wi‑Fi interlinked | Battery + wireless | Phone alerts, voice sync, remote testing | $50‑$80 |
So, which one should you pick? Ask yourself three quick questions: Do you mind a little DIY wiring? Are you comfortable managing a Wi‑Fi device on the ceiling? And how much are you willing to spend now versus over the next ten years?
If you’re a forgetful homeowner who wants set‑and‑forget reliability, the hard‑wired with a ten‑year battery is the safest bet. If you’re renting or can’t run wires, the sealed battery model gives you peace of mind without a mess. And if you love tech and already have a smart hub, the Wi‑Fi alarm adds convenience—just keep it away from routers to avoid that phantom chirp.
Bottom line: matching the detector’s power source and feature set to your home’s layout and habits is the fastest way to silence those late‑night beeps. Take a few minutes, glance at the table, and pick the model that fits your lifestyle. Your future self (and your sleep schedule) will thank you.
Conclusion
We’ve walked through every way to quiet that midnight chirp – from a fresh battery and a good dust‑off to checking humidity, drafts, and the right detector model for your home.
So, what’s the next move? Grab a pen, jot the date you last swapped the battery, and give the unit a quick visual check. If it’s older than ten years, consider a replacement; if not, a brief cleaning and a reset usually does the trick.
In our experience, the simplest habit that saves the most sleep is a six‑month dust‑off and a sticky note on the back of the alarm reminding you when the battery was changed. It costs pennies, but the peace of mind is priceless.
Remember, the goal isn’t to turn your house into a lab – just give the detector a stable spot away from kitchen exhausts, high‑humidity zones, and Wi‑Fi routers humming right above it. A few inches of distance can stop most false chirps.
Finally, if you’ve tried everything and the beeping persists, it’s a sign the sensor’s life is winding down. Replacing the unit now prevents a surprise alarm later and keeps your home safe.
Take a few minutes today, follow the checklist, and enjoy a quieter night. Your future self (and your sleep schedule) will thank you.
FAQ
Why does my smoke detector keep chirping even after I change the battery?
Most people assume a fresh battery fixes everything, but a lingering chirp can mean the unit still has residual charge or a loose contact. After swapping the battery, press and hold the test button for 15 seconds to drain any leftover voltage. If the chirp persists, double‑check that the battery terminals are clean and seated properly. A quick vacuum of the contact area often does the trick.
What’s the difference between a single chirp and a rapid series of beeps?
A single chirp every 30‑60 seconds is the classic low‑battery warning. A rapid series—three or more beeps in quick succession—usually signals that the sensor has detected smoke or a fault condition. In the latter case, the alarm is doing its job; you should evacuate, test the unit, and if it keeps beeping without smoke, it may need a full replacement.
Can humidity or steam really cause a smoke detector to chirp?
Absolutely. High humidity or steam from a kitchen exhaust or bathroom can trick the sensor’s electronics into thinking there’s a fault. If you notice chirping right after running the dishwasher or taking a hot shower, try moving the alarm at least six inches away from the vent. A small hygrometer can help you verify that the area stays below 60 % relative humidity.
How often should I clean my smoke detector to prevent false chirps?
We recommend a light dust‑off every six months and a deeper clean once a year. Use a soft brush or a low‑suction vacuum to clear dust from the sensor dome, then follow up with a quick burst of compressed air if you have it. After cleaning, hold the test button for 15 seconds to reset the unit and flush any lingering charge.
My hard‑wired alarm still chirps after a power outage—what should I do?
Hard‑wired units can get confused after a brief loss of power. Turn off the circuit breaker for the alarm’s circuit, wait a full minute, then flip it back on. This power‑cycle clears any stored error state. After the breaker is back on, press the test button to confirm the alarm is silent. If the chirp returns, check the backup battery and consider whether the unit is nearing the end of its 8‑10‑year lifespan.
When is it time to replace the whole smoke detector instead of troubleshooting?
If you’ve tried battery replacement, cleaning, and resetting and the chirp still won’t stop, the sensor’s internal components are likely degrading. Look for the manufacture date on the back of the unit—most models are good for 8‑10 years. Once you hit that window, replacement is the safest route. Newer models often come with sealed 10‑year lithium cells, which eliminate the low‑battery chirp altogether.
Is there a quick way to know if a chirp is a false alarm or a real fire risk?
Listen to the pattern. A steady single chirp is usually a maintenance reminder; a rapid, repeating series often means smoke or heat is present. If the alarm sounds continuously or the beeping gets louder, treat it as a real fire risk and evacuate immediately. For intermittent chirps, follow the checklist above—battery, dust, humidity, and placement—to rule out false triggers.